
Efficient landscape design is more than an aesthetic pursuit; it is a calculated orchestration of ecological relationships and human energy. Most property owners view their outdoor space as a static canvas for ornamentation, yet a professional consultant approaches the land as a dynamic system of energy inputs and outputs. The methodology known as permaculture zone design provides a framework for arranging elements according to the frequency of human interaction, ensuring that the highest maintenance areas are closest to the home while the more self-sustaining systems are situated at the periphery. By aligning site layout with natural patterns such as sun exposure, wind direction, and topographic elevation, we can create a landscape that increases in value and fertility over time with minimal intervention.
This approach addresses the primary challenges of modern landscaping, such as rising water costs, labor-intensive maintenance, and the ecological decline of sterile turf lawns. A well-designed permaculture system enhances curb appeal by using diverse textures and layers rather than the monotonous rows of exotic ornamentals found in typical suburban developments. The goal is to maximize the utility of every square foot, whether through food production, carbon sequestration, or the creation of functional outdoor living rooms. When we plan according to zones, we acknowledge that the human element is a finite resource. By placing a kitchen herb garden just steps from the back door, we guarantee its success; conversely, by placing a heavy timber woodlot at the far edge of the property, we respect the natural timeline of forest growth.
Landscape Design Principles
Successful permaculture design hinges on several core architectural principles that ensure long-term stability and visual harmony. The first is the concept of elevation and water management. Before any plants are selected, the landscape architect must analyze the topography to determine how water moves across the site. By utilizing Swales, which are trenches dug on contour, and Berming, we can capture rainfall, slowing it down and allowing it to infiltrate the soil rather than causing erosion. This passive Irrigation strategy turns the soil into a literal sponge, reducing the need for municipal water sources during dry seasons.
Symmetry and focal points also play a critical role in guiding the eye and the body through the space. While traditional landscapes favor rigid, formal symmetry, permaculture utilizes functional focal points such as a Wildlife Pond or a central Gazebo to anchor the design. These elements serve as “nodes” that connect different zones. Walkways should be planned with dual purposes in mind; a path is not just a transit route but an opportunity for Edging with beneficial plants like Creeping Thyme or Stonecrops. Furthermore, visual balance is achieved by varying the elevation layers, placing canopy trees at the north side of the property to provide wind protection without shading out the solar-intensive crops in the center.
Plant and Material Selection
The following table outlines plants and materials commonly used in a high-efficiency permaculture design, categorized by their ecological role and maintenance requirements.
| Plant Type | Sun Exposure | Soil Needs | Water Demand | Growth Speed | Maintenance Level |
| :— | :— | :— | :— | :— | :— |
| Fruit Trees | Full Sun | Well-drained | Moderate | Medium | High (Pruning) |
| Comfrey | Full/Partial | Nutrient-rich | Low | Fast | Very Low |
| Berry Bushes | Partial Sun | Acidic/Loamy | Moderate | Medium | Low |
| Lavender | Full Sun | Sandy/Dry | Low | Medium | Low |
| Hazelnut | Full/Partial | Deep Loam | Moderate | Fast | Low |
| White Clover | Full/Partial | Any | Low | Very Fast | Lowest |
| Native Oaks | Full Sun | Diverse | Low | Slow | Minimal |
Implementation Strategy
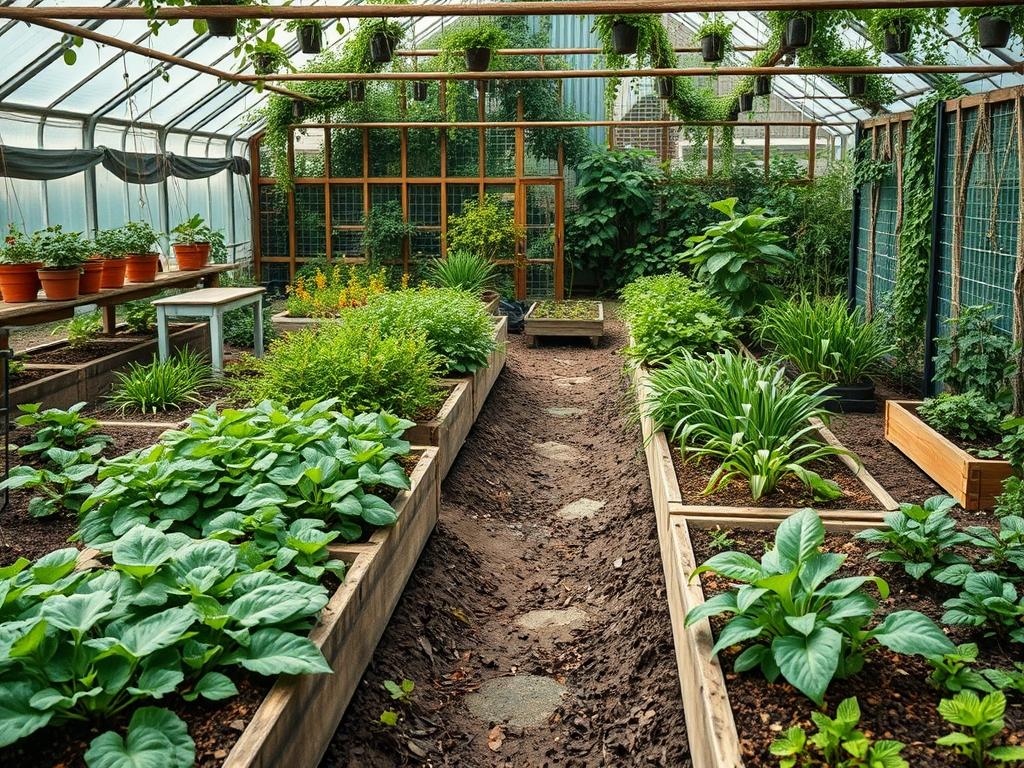
The transition from a conceptual base map to a living landscape requires a systematic implementation strategy. The first step involves a comprehensive site analysis where we observe sunlight patterns, prevailing winds, and existing drainage issues. Once these sectors are mapped, we begin with the “earthworks” phase. This is the time for Grading to correct any slope issues and installing primary hardscaping like Retaining Walls or Flagstone Patios. These structures provide the backbone of the landscape and should be installed before any perennial vegetation to avoid root damage or soil compaction later.
After the hardscaping is secure, we focus on soil preparation. Instead of tilling, which destroys the soil microbiome, we utilize “sheet mulching.” This involves laying down a layer of cardboard to suppress weeds followed by 8 to 12 inches of organic Mulch, such as Wood Chips or Straw. This process mimics a forest floor, building tilth and moisture retention. When planting begins, we organize species into guilds. A guild is a grouping of plants that support one another; for example, a Pear Tree might be surrounded by Daffodils to repel voles, Comfrey to accumulate nutrients, and Peas to fix nitrogen in the soil. Final touches include installing Drip Irrigation systems for Zone 1 and 2 and defining paths with Structural Edging to prevent invasive grass encroachment.
Common Landscaping Failures
The most frequent mistake in landscape design is the failure to account for the mature size of plant species, leading to root overcrowding and poor air circulation. Many homeowners plant a Spruce Tree three feet from their foundation, only to realize a decade later that the roots are compromising the structure. Improper spacing also leads to fungal diseases as foliage becomes dense and lacks airflow. Another critical failure is neglecting “sector analysis,” such as placing a delicate vegetable garden in a wind tunnel or a shade-loving species in a high-heat “sun trap” reflected off a white garage wall.
Soil Compaction is the silent killer of urban landscapes. During construction, heavy machinery exerts thousands of pounds of pressure, crushing the air pockets necessary for root respiration. Without remediation, even the most expensive plants will struggle to thrive. Additionally, many irrigation systems are set to a “one size fits all” schedule, resulting in overwatered turf and underwatered trees. Drainage mistakes, such as directing downspouts toward the foundation instead of a French Drain or Rain Garden, can lead to catastrophic property damage and soil erosion that strips away valuable topsoil.
Seasonal Maintenance
Seasonal management in a permaculture-designed landscape is significantly less intensive than traditional lawn care, but it requires a more nuanced understanding of ecology. In the Spring, the focus is on “awakening” the landscape. This includes pruning fruit trees while they are still dormant, clearing debris from Culverts, and refreshing the Mulch layers. It is also the time to test soil pH and apply organic amendments like Compost Tea if necessary.
Summer maintenance is primarily about water conservation and harvesting. Checking the Irrigation lines for leaks and ensuring the Swales are free of obstructions is crucial. As the heat intensifies, monitoring the moisture depth at the 6-inch mark helps determine if deep-root watering is required for newly established trees. In the Autumn, the landscape architect’s role shifts to preparation and “locking in” nutrients. Rather than bagging leaves, we “leave the leaves” to provide habitat for pollinators and insulation for the soil. This is also the ideal time for planting new perennials and bulbs, as the cooling air and warm soil encourage rapid root development. During Winter, the landscape is mostly dormant, allowing time for tool maintenance and mapping out the expansion of future zones.
Professional Landscaping FAQ
How does Permaculture Zone 1 differ from Zone 2?
Zone 1 contains elements requiring daily attention, like kitchen herbs and salad greens. Zone 2 includes perennial crops, orchards, and poultry that require frequent, but not necessarily daily, observation and maintenance.
What is the best material for eco-friendly walkways?
Crushed Limestone, Permeable Pavers, or Mulched Earth are superior choices. These materials allow rainwater to penetrate the ground, reducing runoff and cooling the local microclimate compared to solid asphalt or poured concrete.
How do I stop soil erosion on a steep slope?
Install a series of Check Dams or Terraces using Natural Stone or Hardwood Logs. Planting deep-rooted native grasses and woody shrubs will further stabilize the subsoil through mechanical root reinforcement and moisture management.
Why are native plants preferred over exotic ornamentals?
Native Plants have co-evolved with local climate patterns and wildlife. They require significantly less water, no synthetic fertilizers, and provide essential nectar and nesting sites for beneficial insects and birds.
How deep should my mulch layer be for weed suppression?
A depth of 3 to 4 inches is standard for established beds. However, when using the sheet mulching method for new garden beds, a thickness of 8 to 12 inches is recommended to ensure complete weed suppression.