
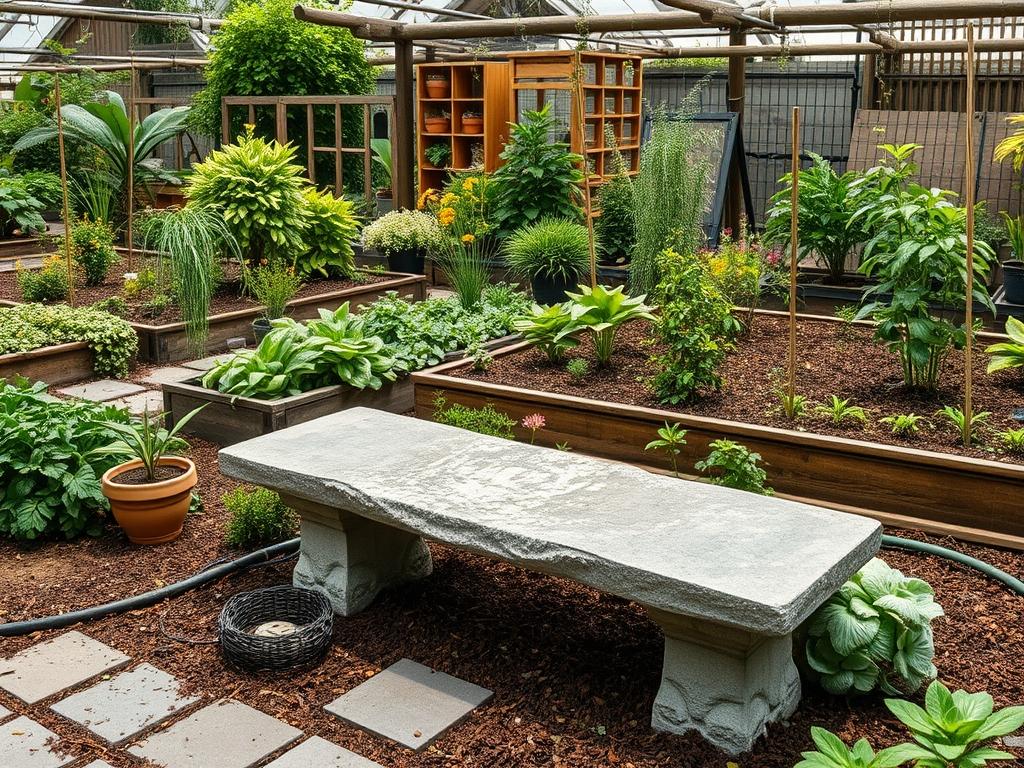
Integrating a permanent seating element into a garden landscape requires more than simply placing a slab of rock in a cleared patch of dirt. A Traditional Stone Bench Design serves as a structural anchor, providing a destination within the outdoor environment that encourages lingering and quiet observation. As a landscape architect, I view the stone bench as a convergence of art and engineering. It must withstand the relentless cycles of freeze and thaw while appearing as if it has always belonged to the local geology. The challenge lies in balancing the heavy, immovable nature of stone with the fluid, evolving needs of a living garden. Whether you are dealing with a small urban courtyard or an expansive rural estate, the placement of this feature influences the entire flow of the space. It dictates how one travels through the garden, where the eye rests, and how the surrounding microclimate is perceived. A well placed bench transforms a transit route into a room, adding significant curb appeal and functional value to the property.
Prioritizing the structural integrity of the site is the first step in any high end installation. We must consider the thermal mass of the stone, which absorbs heat during the day and releases it slowly at night, potentially affecting nearby sensitive plantings. In colder climates, the foundation of the bench must extend below the frost line to prevent shifting, which can lead to cracks in the masonry or an uneven seat. By addressing these technical demands early in the planning phase, we ensure that the bench remains a timeless fixture rather than a maintenance liability.
Landscape Design Principles
Successful garden planning relies on the fundamental concept of “genius loci” or the spirit of the place. When implementing a Traditional Stone Bench Design, symmetry and visual balance become paramount. In a formal landscape, the bench often sits at the terminus of a primary axis, acting as a focal point that draws the viewer down a central path. This creates a sense of order and grandeur. Conversely, in a naturalistic or woodland setting, the bench may be tucked into a curve of the path, offering a surprise for the visitor. This asymmetrical approach emphasizes discovery rather than directed movement.
Elevation layers are another critical consideration. A bench should never feel like an island floating in a sea of mulch. By using retaining walls or raised planters, you can cradle the seating area, providing a sense of “prospect and refuge.” This psychological principle suggests that humans feel most comfortable when their backs are protected while they have a clear view of the surrounding terrain. To achieve this, we often place taller Taxus baccata or viburnum behind the bench, while keeping the foreground open with low growing perennials.
Irrigation planning must be integrated into the design before a single stone is moved. Water should always flow away from the base of the bench to prevent soil erosion and the accumulation of moss or algae on the stone surface. Walkways leading to the bench should be wide enough for two people to walk comfortably, typically at least 36 inches, and constructed from materials that complement the bench, such as decomposed granite, flagstone, or pea gravel. This material continuity ensures that the hardscaping feels cohesive rather than fragmented.
Plant and Material Selection
The following table outlines high performing species and materials that complement a traditional stone installation, ensuring seasonal interest and structural stability.
| Plant or Material Type | Sun Exposure | Soil Needs | Water Demand | Growth Speed | Maintenance Level |
| :— | :— | :— | :— | :— | :— |
| English Lavender | Full Sun | Well-drained/Sandy | Low | Medium | Low |
| Boxwood (Green Velvet) | Full to Part Sun | Loamy/Neutral | Medium | Slow | Medium |
| Japanese Maple | Filtered Shade | Rich/Organic | Medium | Slow | Medium |
| Creeping Thyme | Full Sun | Poor/Well-drained | Low | Fast | Low |
| Crushed Limestone | N/A | Subgrade Base | N/A | N/A | Low |
| Geotextile Fabric | N/A | Under Base Layer | N/A | N/A | None |
| Natural Granite | N/A | Surface | N/A | N/A | Low |
Implementation Strategy
The construction of a Traditional Stone Bench Design begins with meticulous site preparation. First, the area must be excavated to a depth of at least 8 inches to accommodate the sub-base. The footprint of the excavation should be slightly wider than the bench itself to provide a stable perimeter. Once the soil is removed, a layer of geotextile fabric is laid down to prevent the soil from mixing with the aggregate. This is followed by 6 inches of 3/4-inch crushed stone, which must be compacted using a plate compactor or a hand tamper. A level base is the only defense against future settling.
After the base is compacted, a 1-inch layer of leveling sand or stone dust is applied. This allows for fine adjustments when setting the vertical supports, often called “plinths” or “legs.” For a traditional look, the seat height should be between 18 and 20 inches from the finished ground level. If the bench is a dry-stack construction, the stones are carefully selected for their interlocking shapes. If a more formal look is desired, a type N mortar or a high-strength masonry adhesive is used to secure the horizontal slab to the supports.
Edging and mulch depth play a vital role in the transition between the hardscape and the garden beds. A steel edging or cobblestone border prevents grass from encroaching on the stone base. Around the bench, a 3-inch layer of cedar mulch or pine bark helps retain moisture for nearby plants while suppressing weeds. Finally, ensure that the surrounding landscape lighting, perhaps a low voltage path light or an uplight on a nearby tree, is positioned to wash the bench in a soft glow without creating harsh shadows for the person seated.
Common Landscaping Failures
One of the most frequent errors in bench installation is neglecting proper drainage. If the area around the bench is a low point in the yard, water will pool, leading to a muddy mess and potential damage to the stone foundation during winter freezes. A French drain or a slight grade adjustment of 2 percent away from the structure can mitigate this risk. Another common issue is root overcrowding. Planting a large, fast growing tree too close to a stone bench will eventually lead to the roots heaving the heavy slabs, throwing the seat out of level. Always research the mature root spread of any nearby Quercus or Acer species.
Improper spacing is a design failure that affects the functionality of the reflection space. If the bench is placed too close to a walkway, the knees of the seated person may block the path. If it is too far, it can feel isolated and uninviting. Soil compaction is another silent killer of garden health. During the construction of a stone bench, the heavy traffic of workers and materials can crush the air pockets in the surrounding soil. It is essential to aerate the soil and add organic compost back into the beds once the hardscaping is complete. Finally, irrigation inefficiencies, such as sprinkler heads spraying directly onto the stone, can cause mineral staining or “efflorescence,” which is difficult to remove without harsh chemicals.
Seasonal Maintenance
Landscape management is a year round commitment that ensures the Traditional Stone Bench Design remains a pristine sanctuary. In the spring, the focus is on cleaning and inspection. Scrub away any biological growth with a soft brush and a mixture of water and mild soap. Inspect the joints for any mortar failure caused by the previous winter. This is also the time to apply a seasonal pre-emergent weed control to the surrounding mulch beds.
During the summer, the primary task is managing the surrounding vegetation. Pruning is necessary to keep sightlines clear and to ensure that plants like English Lavender do not flop over onto the seating area. If the weather is particularly dry, check the moisture levels of plants near the bench, as the stone can radiate heat and dry out the soil faster than in other parts of the garden.
Autumn requires the removal of leaves and debris that can trap moisture against the stone, leading to staining or rot if the bench has any wooden components. This is also the ideal time to add a fresh layer of mulch to protect the roots of the surrounding plants. In winter, the main goal is to avoid the use of harsh de-icing salts near the stone. Salts can penetrate the pores of materials like sandstone or limestone, causing them to spall or flake. If the bench is in a high traffic area, use sand for traction instead.
Professional Landscaping FAQ
What is the best type of stone for a reflection bench?
Granite and basalt are excellent choices due to their density and resistance to weathering. Limestone and sandstone offer a softer, traditional aesthetic but are more porous and may require periodic sealing to prevent deep staining.
How do I prevent my stone bench from sinking over time?
A solid foundation is essential. Dig a trench at least 8 inches deep, fill it with crushed stone, and compact it thoroughly. Using a geotextile membrane between the soil and the gravel prevents the base from migrating into the earth.
Is it necessary to use mortar for a stone bench?
Not always. A dry-stack approach relies on gravity and precision fitting, providing a rustic look. However, for a single slab seat on two pillars, a high-strength masonry adhesive ensures safety and prevents the heavy top from sliding off.
How can I make the area around the bench feel more private?
Utilize “layered planting.” Place a tall evergreen hedge like Arborvitae or Yew in the back, followed by medium-sized shrubs, and finally low perennials. This creates a living wall that dampens sound and blocks unwanted views.
Can I install a stone bench on a sloped area?
Yes, but you must first create a level terrace. This often involves building a small dry-stone retaining wall to hold back the slope, creating a flat “cove” where the bench can sit securely without the risk of sliding.