
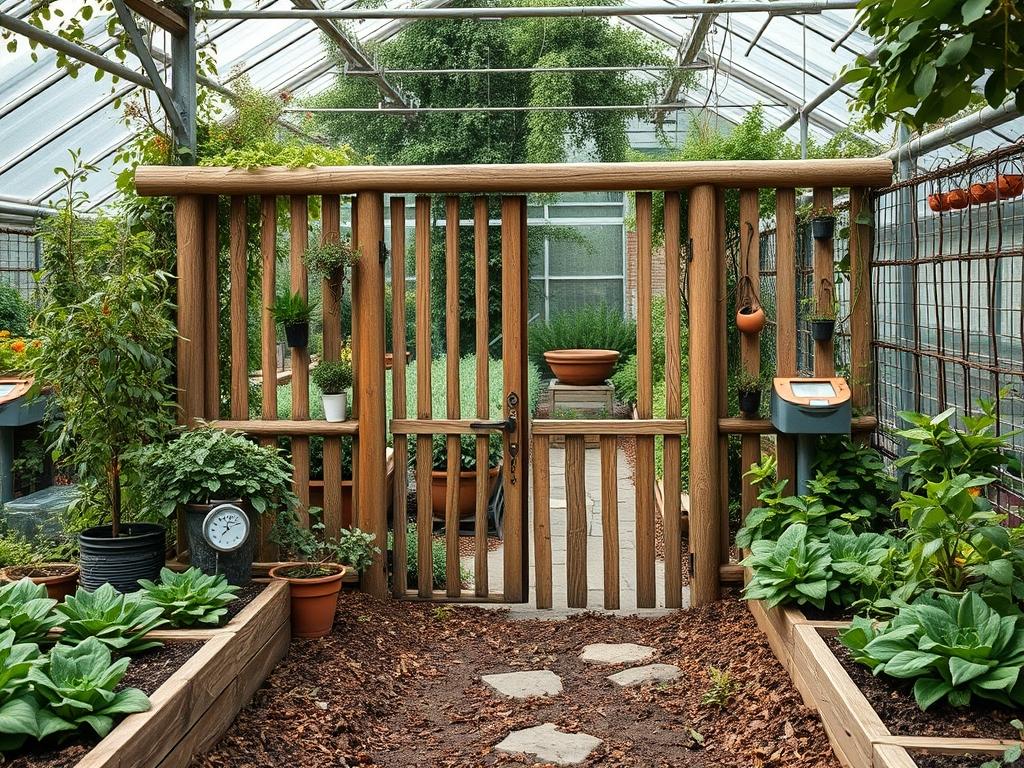
The garden gate serves as more than a physical barrier; it functions as a stylistic threshold that transitions the observer from the public domain to a curated private sanctuary. In traditional landscape architecture, the entry point defines the architectural vocabulary of the entire property. Traditional Wattle Gates offer a unique aesthetic that balances rustic charm with sophisticated structural geometry. These gates, historically crafted from coppiced wood such as hazel or willow, provide a tactile, organic contrast to the rigid lines often found in modern hardscaping. When designing an entryway, a landscape consultant must consider the local climate, as high wind areas require a gate with enough permeability to allow air to pass through without creating a sail effect. Furthermore, the gate must integrate seamlessly with the existing fence line or hedgerow to enhance curb appeal and establish a clear sense of place. Functionality remains the priority, ensuring the swing radius is clear of obstructions and the hardware can withstand the specific hydrostatic pressures of the local environment.
Landscape Design Principles
Successful landscape design rests on the mastery of visual balance and the strategic placement of focal points. A wattle gate acts as a primary focal point, drawing the eye toward the transition between different outdoor rooms. To achieve symmetry, the gate should be flanked by uniform plantings or structural elements like stone pillars. Elevation layers are equally critical; the gate should not sit in a topographical depression where water might pool. Instead, the surrounding grade should slope away from the entryway to ensure the longevity of the timber posts. Visual weight is also a factor. A heavy, dense weave in a wattle gate provides privacy but can feel oppressive if not balanced by lighter, airy plantings like ornamental grasses.
Incorporating walkways that lead to the gate requires careful planning of materials and widths. A minimum width of four feet is standard for primary residential paths, allowing two people to walk side by side. The transition from a driveway or sidewalk to the garden gate should involve a change in texture, perhaps moving from smooth concrete to textured flagstone or coarse pea gravel. This shift signals a change in the environment. Irrigation planning must also account for the gate area. Sprinkler heads should be positioned to avoid frequent saturation of the wooden gate structure, which can lead to premature decay and fungal growth in the weave.
Plant and Material Selection
Selecting the right biological and structural components is essential for a cohesive entryway. The following table outlines plants and materials that complement the aesthetic and functional requirements of traditional wattle installations.
| Plant Type | Sun Exposure | Soil Needs | Water Demand | Growth Speed | Maintenance Level |
| :— | :— | :— | :— | :— | :— |
| Hazel (Corylus) | Full Sun/Part Shade | Well-drained | Moderate | Fast | Low |
| Willow (Salix) | Full Sun | Moist/Wet | High | Very Fast | Moderate |
| Boxwood (Buxus) | Full Sun/Part Shade | Loamy | Moderate | Slow | High |
| English Lavender | Full Sun | Gritty/Alkaline | Low | Moderate | Low |
| Climbing Rose | Full Sun | Humus-rich | Moderate | Fast | High |
| Star Jasmine | Full Sun/Part Shade | Well-drained | Moderate | Moderate | Moderate |
For the gate itself, the primary materials consist of uprights (also known as zales or staves) and weavers (the horizontal rods). Hazel is preferred for its rigidity and durability, while Willow offers superior flexibility for tighter weaves. For the structural frame, Oak or Sweet Chestnut provides the necessary strength to support the weight of the wattle infill without sagging over time.
Implementation Strategy
The construction of a traditional wattle gate begins with robust site preparation. First, evaluate the grading of the entryway. If the ground is uneven, excavate and level the area using a compacted crushed stone base to prevent shifting. Install 6×6 pressure-treated timber posts at a depth of at least three feet, or below the local frost line. Use a spirit level to ensure the posts are perfectly vertical. Secure the posts with a high-strength concrete mix, sloping the top of the concrete away from the post to shed water.
To build the gate frame, use 3-inch diameter oak scantlings. Join the frame using mortise and tenon joints for maximum structural integrity, as the tension of the weave can warp a weak frame. Once the frame is assembled, insert the vertical hazel staves into pre-drilled holes in the top and bottom rails. These staves should be spaced approximately 4 to 6 inches apart. Begin weaving the willow or hazel rods horizontally between the staves. Use a technique called randing, where a single rod at a time is woven in a simple over-under pattern. For added strength at the top and bottom, use pairing, which involves two rods twisting around each stave simultaneously.
After the weaving is complete, trim the ends of the rods with bypass pruners. Apply a UV-resistant wood preservative or a mixture of linseed oil and turpentine to protect the organic fibers from UV degradation and moisture. Finally, install heavy-duty strap hinges that wrap around the gate frame to distribute the load evenly across the structure.
Common Landscaping Failures
One of the most frequent failures in garden entryway design is improper drainage. When water collects at the base of a gate post, it creates a micro-environment for rot and can cause the post to lean as the soil loses its bearing capacity. Another common mistake is neglecting the swing clearance. Designers often plant aggressive groundcovers or shrubs too close to the gate, which eventually obstruct the opening mechanism or scratch the finish of the gate.
Root overcrowding is particularly problematic near gate posts. Planting large trees with invasive root systems too close to the entryway can heave the gate posts over time, rendering the latch useless. Improper spacing between the gate and the posts is also a recurring issue; wood expands and contracts with changes in humidity. A gap that is too tight in the summer may cause the gate to bind in the winter. Finally, failing to address soil compaction during the construction phase can lead to poor plant health around the entryway, as the heavy foot traffic and construction equipment crush the soil structure and limit oxygen availability to the roots.
Seasonal Maintenance
Maintaining a wattle gate and its surrounding landscape requires a systematic seasonal approach. In the Spring, inspect the gate for any brittle or broken weavers that may have snapped during winter freezes. This is the ideal time to apply a fresh coat of wood sealer. Check the gate hardware for rust and lubricate the hinges with a silicone-based spray. Prune any surrounding Boxwood or Lavender to maintain the desired shape and ensure the entryway remains clear.
During the Summer, monitor the irrigation levels. Ensure that water is reaching the roots of the flanking plants but not splashing directly onto the wattle weave. High temperatures can cause the wood to dry out excessively, so a light application of oil may be necessary if the weave begins to feel brittle.
In the Autumn, clear fallen leaves and organic debris from the base of the gate and the tracks of the path. Trapped moisture from wet leaves can accelerate the decay of the lower edge of the wattle. This is also the time to apply a fresh layer of bark mulch to the surrounding garden beds, keeping the depth at a consistent 2 to 3 inches to regulate soil temperature through the coming winter.
Winter maintenance focuses on structural integrity. After heavy snowfalls, gently brush snow off the wattle weave to prevent the weight from bending the horizontal rods. Avoid using harsh de-icing salts near the gate, as these chemicals can damage both the wooden fibers and the sensitive root systems of nearby ornamental plants.
Professional Landscaping FAQ
How long does a traditional wattle gate typically last?
With proper treatment and annual oiling, a hazel or willow gate lasts between seven and ten years. Using a hardwood frame can extend this lifespan significantly by providing a rigid support system that protects the more delicate woven infill from structural stress.
What is the best way to prevent the gate from sagging?
Install a diagonal cross-brace within the frame, running from the bottom hinge corner to the top latch corner. This transfers the weight of the gate back to the hinges and prevents the frame from racking under the tension of the weave.
Can I use fresh green wood for the weaving?
Yes, green wood is preferred because it is pliable and less likely to snap during the weaving process. However, you must account for minor shrinkage as the wood seasons in place. Tighter weaves compensate for the gaps that appear during the drying phase.
How do I choose between hazel and willow for the weave?
Hazel provides a thicker, more robust appearance and superior longevity. Willow is much more flexible, allowing for intricate, decorative patterns and tighter gaps. Choose hazel for boundary security and willow for internal garden dividers where aesthetics are the primary concern.
Is a concrete footing always necessary for the posts?
In well-drained, sandy soils, a deep post buried with compacted gravel may suffice. However, in clay-heavy soils or areas with high wind loads, a concrete footing is essential to provide the lateral stability required to keep the gate plumb over time.