
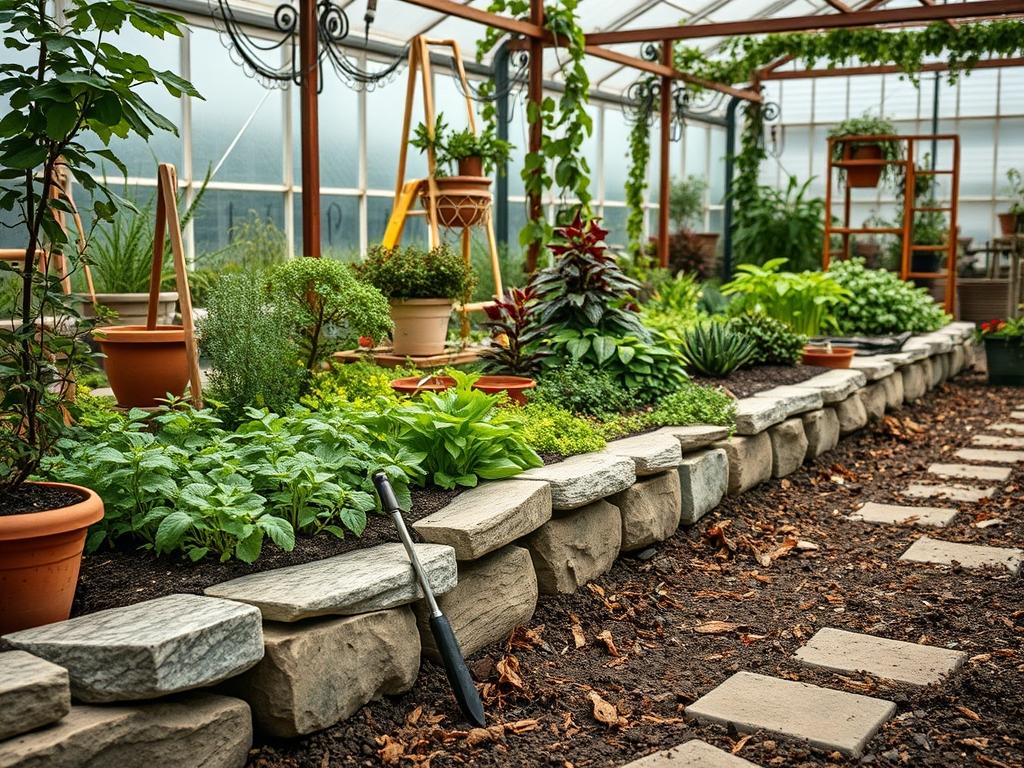
Defining the perimeter of a formal or cottage garden requires more than a simple boundary; it demands a structural element that provides both aesthetic permanence and functional containment. Traditional stone garden edging serves as the backbone of sophisticated landscape design, offering a textural contrast to soft foliage while preventing the encroachment of turf into ornamental beds. In varied climates, the choice of material determines whether the edge remains crisp over decades or succumbs to the pressures of freeze-thaw cycles and soil movement. Achieving high curb appeal involves integrating these hardscaping elements so they appear as a natural extension of the architecture. Beyond simple decoration, these stone barriers facilitate proper drainage, protect delicate root systems from mower damage, and define the transitions between different outdoor living zones.
Landscape Design Principles
Successful integration of traditional stone garden edging requires a deep understanding of visual balance and geometric precision. In traditional landscapes, symmetry often dictates the layout, where mirrored garden beds are anchored by heavy cobblestone or fieldstone borders. These materials provide a sense of weight that anchors the design to the earth. When planning the layout, a designer must consider the sightlines from the primary residence. The edging should guide the eye toward specific focal points, such as a bronze sculpture, a tiered fountain, or a stately Acer palmatum.
Elevation layers add a three-dimensional quality to the garden. By using taller stones or double-stacked limestone blocks, a designer can create subtle retaining walls that elevate planting beds. This technique not only adds visual interest but also assists with irrigation planning. Raised beds allow for gravity-fed drainage, ensuring that water does not pool around the crowns of sensitive plants. Walkways should be planned in tandem with the edging; a flagstone path becomes much more impactful when it is bordered by a contrasting stone material that keeps the surrounding mulch from spilling onto the walking surface. Visual balance is achieved by matching the scale of the stone to the size of the garden. Large granite boulders may overwhelm a small courtyard, while tiny pebbles disappear in a sprawling estate garden.
Plant and Material Selection
Selecting the right combination of flora and minerals is essential for a low maintenance, high impact environment. The following table outlines plants that pair exceptionally well with the thermal properties and aesthetic of natural stone borders.
| Plant Type | Sun Exposure | Soil Needs | Water Demand | Growth Speed | Maintenance Level |
| :— | :— | :— | :— | :— | :— |
| Buxus sempervirens | Full Sun to Part Shade | Well-drained, Rich | Medium | Slow | Low |
| Lavandula angustifolia | Full Sun | Sandy, Alkaline | Low | Medium | Low |
| Hosta fortunei | Full Shade to Part Shade | Moist, Loamy | High | Medium | Medium |
| Salvia nemorosa | Full Sun | Well-drained | Low | Fast | Medium |
| Carex pensylvanica | Part Shade | Loose, Loamy | Medium | Medium | Low |
For the edging itself, sandstone offers a warm, tan palette suitable for Mediterranean designs, while slate provides a cool, contemporary edge. River rock is ideal for informal, rustic borders, but it requires a deeper trench to maintain stability compared to flat-bottomed ashlar masonry.
Implementation Strategy
The process begins with a precise backyard layout plan. Once the lines are marked using a leveling string or marking paint, the ground must be excavated. A professional installation requires a trench at least 6 inches deep and 8 inches wide. This space allows for a 3 inch base of compacted crushed stone or paver base, which prevents the edging from shifting as the ground settles.
Grading is the next critical step. The soil inside the garden bed should be graded to slope slightly away from the center or toward a designated drainage point. After the base is compacted with a hand tamper, the traditional stone garden edging is set into place. Each stone should be tapped with a rubber mallet to ensure it is seated firmly against its neighbor. For a traditional look, the stones are often dry-laid, meaning no mortar is used, but a thin layer of polymeric sand can be swept into the joints to discourage weed growth.
Once the stones are secure, a heavy-duty landscape fabric is applied behind the stones to prevent soil migration. This is followed by the application of mulch. A depth of 3 inches of organic cedar mulch or pine bark is recommended to retain moisture and regulate soil temperature. Finally, the irrigation system, whether it be drip lines or soaker hoses, should be pinned down just inside the stone perimeter to ensure efficient water delivery directly to the root zones.
Common Landscaping Failures
The most frequent error in stone edging installation is the lack of a proper foundation. When stones are placed directly onto topsoil, the natural expansion of wet soil and the subsequent contraction during dry spells cause the stones to tilt and sink. This is especially prevalent in regions with heavy clay. Furthermore, drainage mistakes often lead to the “bathtub effect,” where the stone edging acts as a dam, trapping water within the bed and rotting the roots of the plants. To avoid this, small gaps or weep holes should be incorporated into the design, or the grade must be adjusted to allow for runoff.
Root overcrowding is another common oversight. Designers often plant perennials too close to the stone border without accounting for their mature width. Over time, the expanding root systems can physically push the stones out of alignment. Improper spacing also makes manual weeding and edge trimming difficult. Finally, irrigation inefficiencies occur when spray heads are blocked by tall stones, leaving the plants behind the wall dehydrated while the stone itself becomes covered in unsightly mineral deposits or algae.
Seasonal Maintenance
Spring is the time for a structural audit. As the ground thaws, check for any stones that have shifted due to frost heave and reset them using a 1 inch layer of fresh leveling sand. Apply a new layer of mulch to replace what decomposed over the winter, keeping the level about 1 inch below the top of the stone edge.
During the summer, focus on moisture management. The stones can hold significant heat, which may dry out the soil faster near the edge. Monitor your drip irrigation settings to ensure the peripheral plants are not scorched. Hand-pull any weeds that emerge from the crevices between stones to prevent their roots from dislodging the masonry.
In autumn, the primary task is debris removal. Fallen leaves and organic matter can get trapped against the stone borders, where they decay and create a slick residue. A stiff-bristled broom or a leaf blower should be used to clear these areas. This prevents the buildup of mold and keeps the stone colors vibrant.
Winter landscape management is largely passive, but care must be taken during snow removal. Avoid using rock salt or harsh chemical de-icers near natural stone, as these can cause pitting and spalling on materials like limestone and sandstone. Instead, use coarse sand for traction if the garden path becomes icy.
Professional Landscaping FAQ
What is the best stone for long-term durability?
Granite and quartzite are the most durable options for traditional edging. These igneous and metamorphic rocks resist weathering, acid rain, and physical impact better than softer sedimentary stones like limestone, ensuring the border remains intact for decades.
How deep should my stone edging be buried?
To ensure stability, at least one-third to one-half of the stone’s height should be below the finished grade. For a 6 inch tall stone, burying 3 inches provides enough structural leverage to resist the lateral pressure of the soil.
Can I install stone edging on a slope?
Yes, but it requires a stepped approach. Rather than following the incline diagonally, stones should be installed in horizontal levels that drop down in increments. This prevents soil erosion and creates a more formal, structured appearance in the landscape.
How do I prevent weeds from growing between the stones?
Using a compacted gravel base and filling the joints with polymeric sand is the most effective method. The sand hardens when misted with water, creating a flexible but durable barrier that inhibits seed germination and prevents ants from tunneling.
Is mortar necessary for traditional stone borders?
Mortar is not required for standard garden edging and can often lead to cracking during temperature shifts. A dry-stack method allows the stones to move slightly with the earth, which actually increases the longevity of the installation in most residential settings.