
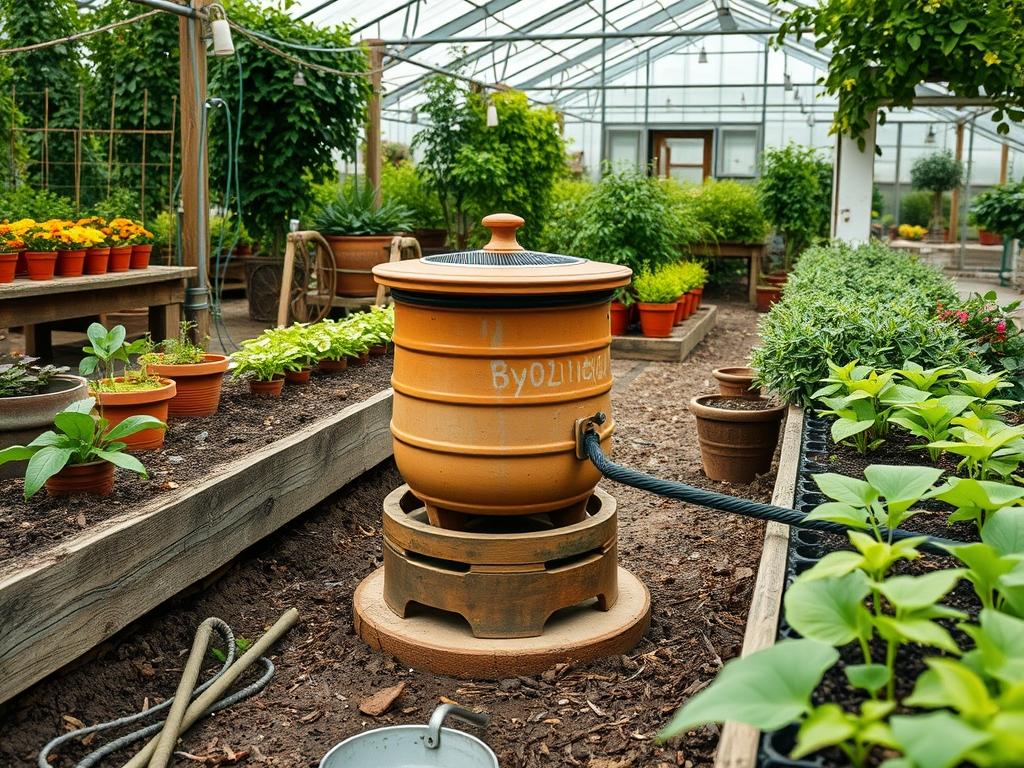
Integrating a Traditional Solar Wax Melter into a cohesive multi-functional landscape requires more than just a sunny corner; it necessitates a sophisticated understanding of microclimates, thermal mass, and site orientation. As a landscape architect, I view the installation of honeybee infrastructure as a structural design challenge where utility must harmonize with high-end aesthetic goals. Many homeowners find that placing utilitarian objects like wax melters haphazardly can disrupt the visual flow of a garden and decrease curb appeal. By treating the melter as a focal point or a functional element within a Mediterranean or xeriscape design, you transform a harvest tool into a deliberate architectural feature. The primary challenge lies in balancing the intense solar exposure required for melting honeycomb with the irrigation needs of the surrounding flora. Proper planning ensures that the heat reflected from the melter does not scorch delicate foliage, while the structural base of the melter prevents soil compaction and drainage issues.
In a professional landscape, every element serves multiple purposes. The Traditional Solar Wax Melter should be positioned to leverage the southern sun, typically requiring a clear southern exposure with no shadows from 10:00 AM to 4:00 PM. This requirement often dictates the entire layout of the backyard. To integrate this successfully, we use grading techniques that elevate the melter above the common garden plane, often placing it on a small Retaining Wall or a leveled Stone Plinth. This elevation serves two functions. First, it brings the working surface to a comfortable height for the beekeeper. Second, it creates a crisp, clean line that defines the production zone of the garden versus the leisure zone. By utilizing hardscaping materials like Bluestone or Decomposed Granite around the melter, we create a fire-safe, clean, and stable environment that prevents mud splashes on the Tempered Glass lid during heavy rain events.
Landscape Design Principles
When incorporating a Traditional Solar Wax Melter, we rely on the principle of symmetry to frame the equipment. Use mirrored plantings of Columnar Evergreens or Italian Cypress to flank the melter area, which gives it a formal, intentional appearance. Focal points are essential; if the melter is designed with high-quality Cedar or Redwood, it can act as a sculptural element. Elevation layers should be utilized to hide the less attractive aspects of harvest, such as storage bins for raw wax. By using a tiered planting system, you can place low-growing Groundcovers in front, followed by a mid-sized Perennial Border, and then the melter itself at the rear of the visual field.
Irrigation planning is perhaps the most technical aspect of this design. Because the melter generates significant heat, the immediate surroundings may experience faster evaporation. We recommend a Drip Irrigation System buried beneath at least 3 Inches of Hardwood Mulch. This keeps the water at the root zone and avoids spraying the glass lid of the melter, which could cause mineral spotting or thermal shock. Walkways should be constructed from Permeable Pavers or Crushed Gravel to ensure the area remains accessible during the spring harvest season when the ground is often soft or saturated. The visual balance is achieved by matching the wood stain of the melter to existing deck or fence features, ensuring the new addition feels like part of the original master plan.
Plant and Material Selection
| Plant Type | Sun Exposure | Soil Needs | Water Demand | Growth Speed | Maintenance Level |
| :— | :— | :— | :— | :— | :— |
| Lavender (Lavandula) | Full Sun | Well-drained | Low | Moderate | Low |
| Russian Sage | Full Sun | Dry, Sandy | Very Low | Fast | Minimal |
| Boxwood Hedge | Full/Partial | Loamy | Moderate | Slow | High (Pruning) |
| Blue Fescue | Full Sun | Poor to Average| Low | Moderate | Low |
| Creeping Thyme | Full/Partial | Gritty | Low | Moderate | Minimal |
| Cedar Lumber | N/A (Material) | Stable Base | N/A | N/A | Moderate |
| Tempered Glass | N/A (Material) | Non-reactive | N/A | N/A | High (Cleaning) |
Implementation Strategy
The implementation begins with a precise grading plan. You must ensure the area for the Traditional Solar Wax Melter is perfectly Level, or slightly sloped away from the hive location to manage runoff. We start by excavating 4 Inches of topsoil and replacing it with a Compacted Crushed Stone Base. This prevents the melter from settling unevenly over time, which would cause the wax to pool in the corners of the Stainless Steel Drip Pan rather than flowing into the collection mold. Once the base is set, we use Landscaping Edging to create a sharp transition between the gravel utility pad and the surrounding lawn or garden beds.
For the construction of the melter itself, we specify 2×4 Pressure-Treated Lumber for the structural frame, though the interior should be lined with High-Density Foam Insulation to maximize heat retention. The exterior should be clad in a rot-resistant wood or painted with a Low-VOC Exterior Deck Stain. The angle of the glass lid is critical; for most temperate latitudes, a 30 Degree Angle is optimal for maximizing solar gain. The interior box should be painted with a High-Heat Matte Black Paint to absorb maximum radiation. We recommend installing a Piano Hinge on the lid for durability and applying a Silicone Weatherstripping seal to prevent heat leakage and keep out opportunistic pests like wax moths.
Once the structure is built, the final stage is the integration of the “softscape.” This involves planting the selected species from the table above in a way that provides a windbreak for the melter without casting shade. A windbreak reduces convective cooling, allowing the internal temperature of the melter to reach the necessary 145 Degrees Fahrenheit more quickly. Finally, we apply a consistent layer of Organic Mulch to the surrounding beds to suppress weeds and unify the aesthetic.
Common Landscaping Failures
The most frequent mistake in garden planning for solar equipment is neglected sun mapping. A site that looks sunny in the winter may be completely shaded by a deciduous tree canopy in July. We use a Solar Pathfinder or digital mapping tools to ensure the Traditional Solar Wax Melter remains productive throughout the harvest season. Another common failure is improper drainage around the base of the structure. If water pools around the wooden frame, it will lead to dry rot and subterranean termite activity, regardless of the wood type used.
Soil compaction is another overlooked issue. Frequent foot traffic around the melter during the harvest can kill the roots of nearby plants. We solve this by installing Step Stones or a Flagstone Path specifically for the reach-in area of the melter. Additionally, many DIY installations fail to account for irrigation inefficiencies. Standard overhead sprinklers will cause moisture to enter the melter box, leading to mold on the wax and rust on the hardware. Always choose targeted Drip Lines or hand-watering for these productive zones. Finally, improper spacing between the melter and the beehives can cause problems. While you want them close for efficiency, placing the melter too close to the hive entrance can trigger “robbing behavior” from the bees, as the smell of melting wax is highly attractive and confusing to them.
Seasonal Maintenance
In the Spring, the focus is on structural integrity and site preparation. Inspect the Traditional Solar Wax Melter for any wood warping that may have occurred during the winter. Check the Silicone Seals and clear any decorative grasses that may have overgrown the solar path. This is also the time to apply a fresh layer of Pre-emergent Weed Control to the gravel base to keep the work area tidy.
Summer maintenance is primarily about temperature management and hygiene. The glass lid must be cleaned weekly with a Vinegar and Water Solution to ensure maximum light penetration. If the internal temperature exceeds 170 Degrees, you may need to slightly vent the lid to prevent the wax from discoloring or “scorching.” Monitor the surrounding plants for signs of heat stress and increase the Drip Irrigation frequency if necessary.
Autumn is the peak season for wax rendering. As the sun angle drops, you may need to adjust the tilt of your melter or move it to a different part of the prepared Stone Pad. Once the final harvest is complete, remove the Drip Pan, clean it thoroughly with Isopropyl Alcohol, and store it indoors.
Winter requires protection for the hardscape and the melter box. If the melter is not being moved to a shed, cover it with a Heavy-Duty Weighted Tarp. Ensure that snow does not pile up against the wooden base, which can lead to moisture wicking. Inspect the surrounding Perennials and cut back dead foliage to prevent pests from nesting near your equipment over the cold months.
Professional Landscaping FAQ
Where is the best place to put a solar wax melter?
Select a south-facing location with unobstructed sunlight. Ensure it is placed on a stable, Level base of Crushed Stone or Pavers to prevent shifting and rot while remaining accessible from your main garden paths.
How does landscaping affect the melter’s efficiency?
Landscaping provides windbreaks that prevent heat loss. However, tall plants or trees can cast shadows that stop the melting process. Low-profile, heat-tolerant plants like Lavender are ideal companions because they do not block the sun.
What materials are best for the melter’s base?
A 4 Inch layer of Compacted Aggregate topped with Pea Gravel or Flagstone is best. This ensures drainage and prevents “splash back” of mud onto the glass lid, keeping the solar collection surface clean.
Can I build a melter into a retaining wall?
Yes, integrating a Traditional Solar Wax Melter into a Stone Retaining Wall is an excellent way to save space. Ensure the wall is engineered to handle the weight and that there is adequate drainage behind the stones.
How do I prevent bees from swarming the melter?
Select a site at least 15 Feet away from the hives. Ensure the melter has a tight Weatherstripping seal. A well-designed landscape includes clear paths so you can quickly move wax inside after it has cooled.