
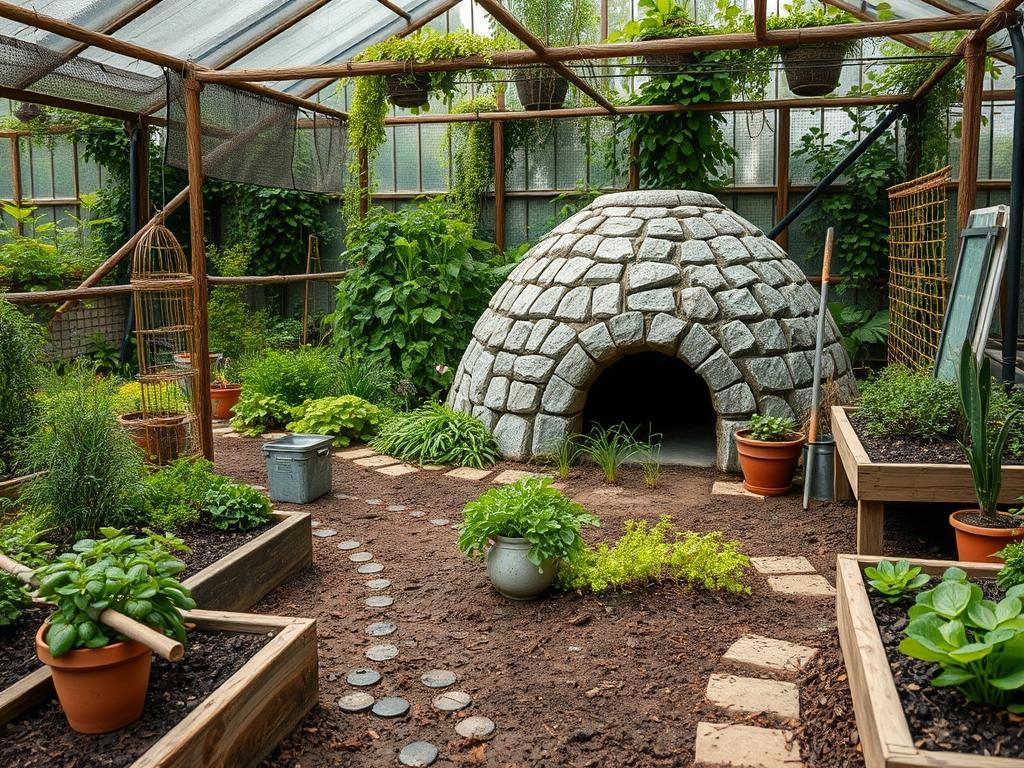
Integrating a functional outdoor kitchen element like a wood-fired earth oven requires more than just a pile of mud and a dream. As a landscape architect, I view these structures as the ultimate marriage of utility and site-specific ecology. When we plan for earth oven construction, we must account for the prevailing winds, proximity to the main dwelling, and the integration of surrounding vegetation that can withstand high temperatures. The challenge lies in creating a permanent fixture that enhances property value while minimizing the risk of fire or structural degradation due to moisture. A well-placed oven serves as a secondary focal point, drawing the eye across the garden and encouraging movement through the outdoor space.
Successful outdoor environment design treats the earth oven as part of a larger ecosystem. This means considering the grading of the land to ensure water moves away from the oven base and planning walkways that provide easy access from the house without trampling sensitive root zones. By using local subsoil clay and natural straw, we create a structure that feels as if it grew out of the landscape rather than being dropped into it. This approach satisfies the modern desire for sustainable, biophilic design while providing a high-performance cooking tool. The thermal mass of the structure, once cured, provides a unique aesthetic that complements both rustic and contemporary garden styles.
Landscape Design Principles
When designing the layout for a new earth oven, symmetry and visual balance are paramount. The oven should not sit in isolation; instead, it should be anchored by retaining walls or a stone plinth that mirrors the materials used in the home or existing patio. For an oven of substantial size, typically with a 36-inch interior diameter, we must consider its visual weight. Positioning it at a corner or the end of a long vista creates a strong focal point. If the oven is too close to a fence or a dense hedge, it feels cramped and presents a fire hazard. We recommend a minimum clearance of 10 feet from any combustible structures or low-hanging tree canopies.
Elevation plays a critical role in user comfort and structural longevity. Building the oven on an elevated hearth made of stone or reclaimed bricks prevents the cook from having to stoop and protects the base of the oven from ground moisture. Integrating this elevation with tiered planting beds can soften the transition between the hardscape and the garden. Irrigation planning is another vital factor. We must ensure that automated sprinkler heads are not positioned to spray the oven, as thermal shock from cold water can crack the hot clay shell. Instead, drip irrigation should be used for nearby plants. This keeps the immediate area around the oven dry while maintaining the health of the surrounding flora.
Plant and Material Selection
The following materials and plant species are recommended for an earth oven project to ensure both structural integrity and aesthetic harmony.
| Plant or Material | Type | Sun Exposure | Soil Needs | Water Demand | Growth/Use |
| :— | :— | :— | :— | :— | :— |
| Rosmarinus officinalis | Woody Herb | Full Sun | Well-drained | Low | Culinary/Heat Tolerant |
| Lavandula | Flowering Shrub | Full Sun | Sandy/Rocky | Low | Fragrance/Border |
| Schizachyrium scoparium | Ornamental Grass | Full Sun | Tolerant | Very Low | Texture/Privacy |
| Subsoil Clay | Natural Binder | N/A | High Plasticity | N/A | Structural Bonding |
| Sharp Sand | Aggregate | N/A | Clean/Coarse | N/A | Thermal Mass Base |
| Barley Straw | Fiber | N/A | Dry | N/A | Tensile Strength |
Implementation Strategy
The construction of an earth oven begins with a rigorous site analysis. Before any earth is moved, check the grading of your yard. The oven needs a level, compacted foundation to prevent settling. Start by excavating the area for your base and filling it with 4 to 6 inches of crushed gravel. This layer provides essential drainage and a stable platform for your masonry or timber plinth. Once the base is at the desired height, which is usually around 36 inches, you can begin the oven floors. We recommend using high-heat firebricks laid in a tight pattern on a bed of leveling sand. These bricks will hold the heat for baking.
Next, create a sacrificial form using damp sand. This form should look like a rounded dome, typically 16 inches high for a standard size oven. Cover this sand dome with wet newspaper to prevent it from sticking to the clay. The first layer of the oven, the thermal mass layer, consists of a mix of one part clay to three parts sand. Apply this mix around the sand dome at a thickness of 3 to 4 inches, packing it tightly with a rubber mallet to remove air pockets. After this layer has partially dried, apply the insulation layer. This is a mixture of clay slip and a high volume of chopped straw, which creates tiny air pockets that trap heat inside the oven.
Once the structure is built, the final aesthetic touches involve edging and mulch. Define the area around the oven with steel edging or limestone blocks to create a distinct zone. Apply a 3-inch layer of hardwood mulch around the base, but ensure it does not touch the oven itself. The final step is to carefully cut out the doorway and scrape the interior sand out. This reveals the hollow baking chamber. Allow the oven to air dry for several weeks before lighting a series of small, curing fires.
Common Landscaping Failures
The most frequent mistake in earth oven construction is poor moisture management. If the oven is built in a low spot without proper drainage, the clay will absorb groundwater and eventually slump or melt. It is essential to site the oven on high ground or install a French drain to divert runoff. Another common error is root overcrowding. Planting large, fast-growing trees too close to the oven foundation can lead to root intrusion, which may heave the base and cause the oven to crack. Always research the mature root spread of any nearby native plants.
Soil compaction is often overlooked during the construction phase. Heavy traffic around the oven during the building process can compress the soil, leading to poor plant growth and standing water. Using plywood sheets to distribute weight can mitigate this. Additionally, many DIY builders ignore the importance of proper spacing for heat dissipation. Placing an earth oven directly against a wooden fence or beneath an arbor with resin roofing is a recipe for disaster. There must be adequate airflow to prevent heat buildup on adjacent surfaces. Finally, failing to apply a protective limewash or a permanent roof structure over the oven will result in erosion from rain.
Seasonal Maintenance
Landscape management is an ongoing process that changes with the calendar. In the spring, inspect the oven for any cracks that may have developed over the winter. Small fissures can be patched with a fresh mix of clay and fine sand. This is also the time to refresh the mulch around the base and prune back any Lavandula or Rosemary that may be encroaching on the work area. Spring is perfect for checking the irrigation lines to ensure they are pressurized and not leaking near the oven base.
During the summer, the focus shifts to fire safety. Keep the area clear of dry leaves and debris. If the weather is exceptionally dry, lightly mist the surrounding vegetation, but take care not to get the oven itself wet. In the autumn, perform a deep clean of the interior and remove any accumulated ash. This ash can be added to your compost or sprinkled around acid-loving plants in small amounts. In winter, protection is the priority. If your oven does not have a permanent roof, cover it with a heavy-duty, breathable canvas tarp. Never use plastic, as it can trap condensation and cause the clay to soften. Ensure the drainage paths are clear of snow or fallen leaves to prevent puddling around the foundation.
Professional Landscaping FAQ
How deep should the foundation for an earth oven be?
A stable foundation requires a trench at least 8 to 12 inches deep. It should be filled with compacted gravel and topped with a solid plinth to prevent the structure from shifting during freeze-thaw cycles.
Can I use any clay from my backyard?
You can use native clay if it has high plasticity. To test, roll a piece into a thin rope; if it bends without breaking, it is suitable. You may need to screen it to remove stones and organic matter.
What is the best way to prevent the oven from cracking?
Cracking is minimized by using the correct clay-to-sand ratio and allowing the oven to dry slowly. Avoid large fires initially. A series of small coal-based fires will temper the material and draw out remaining moisture safely.
How do I protect the oven from rain?
The best protection is a permanent roof or a gazebo structure. Alternatively, you can apply several coats of limewash or a breathable plaster. These finishes shed water while allowing internal moisture to evaporate.
Are there specific plants I should avoid planting nearby?
Avoid highly flammable plants like Juniper or Eucalyptus. Also, stay away from water-hungry trees with invasive roots, such as Willows or Silver Maples, which can destabilize the oven’s stone base and underground drainage systems.