
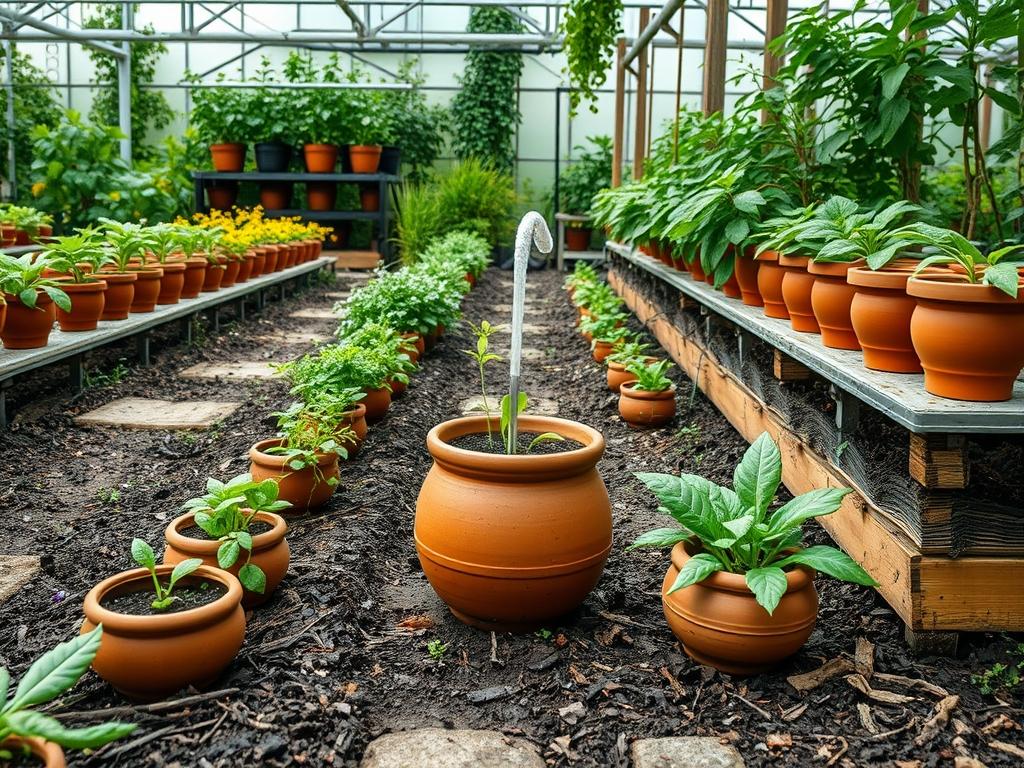
Modern landscape architecture faces an increasingly difficult paradox: the desire for lush, vibrant vegetation versus the reality of tightening water restrictions and unpredictable precipitation patterns. In many arid or semi-arid climates, traditional overhead irrigation systems often fail because of high evaporation rates and uneven distribution. Integrating Traditional Clay Pot Irrigation, often referred to as Olla technology, provides a sophisticated solution that marries ancient civil engineering with contemporary sustainability. By burying unglazed terracotta vessels within the root zones of premium plantings, designers can achieve high aesthetic standards while reducing water consumption by as much as seventy percent. This method focuses on subsurface hydration, which encourages deeper root growth and minimizes the surface moisture that often leads to weed germination and fungal pathogens. Beyond mere utility, clay pot irrigation enhances the functionality of an outdoor living space by eliminating the noise and spray drift associated with mechanical sprinklers, allowing for a more serene environment.
Landscape Design Principles
When conceptualizing a garden layout that incorporates subsurface clay irrigation, architects must prioritize the spatial relationship between the water source and the target foliage. Symmetry in a formal garden can be maintained by placing ollas at regular intervals along a central axis, ensuring that each plant receives equal moisture without the distraction of visible plastic tubing or spray heads. For a more naturalistic or cottage-style approach, these vessels can serve as subterranean Focal Points around which ornamental clusters are staged. The Elevation Layers of a garden also dictate pot placement; for instance, pots placed on a terraced slope or near Retaining Walls must be carefully leveled to prevent uneven water distribution.
A successful design also integrates Walkways and hardscaping in a way that allows for easy access to the pot openings for refilling. If the pots are buried in the middle of a deep garden bed, the designer should include stepping stones or gravel paths to prevent Soil Compaction when maintenance is performed. By grouping species with similar water requirements, a practice known as hydro-zoning, the professional can ensure that the moisture released through the porous clay wall matches the biological demands of the surrounding flora. This visual balance creates a cohesive environment where the irrigation infrastructure is entirely invisible, leaving only the healthy, thriving plants to define the aesthetic.
Plant and Material Selection
| Plant Type | Sun Exposure | Soil Needs | Water Demand | Growth Speed | Maintenance Level |
| :— | :— | :— | :— | :— | :— |
| English Lavender | Full Sun | Well-drained, sandy | Low to Moderate | Medium | Low |
| Heirloom Tomato | Full Sun | Rich, loamy organic | High | Fast | Moderate |
| Purple Coneflower | Full to Partial Sun | Versatile, well-drained | Moderate | Medium | Low |
| Bell Peppers | Full Sun | Nutrient-dense loam | Moderate | Medium | High |
| Creeping Thyme | Full Sun | Sandy, rocky soil | Low | Medium | Very Low |
| Hosta | Shade to Partial Sun | Moist, rich soil | High | Slow | Low |
Implementation Strategy
The successful installation of a Traditional Clay Pot Irrigation system begins with a comprehensive site analysis. The designer must assess the Grading of the lot to ensure that water does not pool around the base of the buried pots, as excess exterior moisture can interfere with the clay’s natural osmotic pull. Once the planting zones are established, a hole should be excavated for each Olla that is approximately twice the width of the vessel itself. This allows for the backfilling of a specialized soil mix, often a blend of Native Soil and Organic Compost, which facilitates the movement of water from the clay wall to the plant roots.
The pot should be buried so that only the neck sits an inch or two above the finished grade. This prevents debris and Hardwood Mulch from falling into the reservoir while remaining accessible for hand-filling with a garden hose or a sophisticated low-pressure gravity-fed line. After the pot is positioned, it is crucial to pack the soil firmly around its exterior to eliminate air pockets, as the physics of the system rely on direct contact between the clay and the earth. Once the pot is filled with water for the first time, a Lid or heavy stone must be placed over the opening. This prevents evaporation and stops mosquitoes from using the standing water as a breeding ground. Finally, a layer of Coarse Mulch should be applied at a depth of 3 inches across the entire garden bed to further regulate soil temperature and retain the moisture released by the subsurface system.
Common Landscaping Failures
One of the most frequent errors in implementing clay pot irrigation is the selection of improper materials. Using a glazed or painted ceramic pot will completely negate the system, as the water cannot permeate the sealed surface. Only high-fired, unglazed Terracotta offers the necessary porosity for capillary action to occur. Another common mistake involves Root Overcrowding. If plants are placed too far from the pot, their roots will not sense the moisture gradient and will fail to grow toward the source. Conversely, aggressive woody shrubs or trees should not be paired with small ollas, as their powerful root systems can eventually crush the clay vessel.
Drainage failures also plague many amateur installations. If the surrounding soil is heavy clay with poor percolation, the water released by the pot may sit stagnant, leading to root rot. Professionals should always test the drainage of the site before committing to a large-scale olla installation. Additionally, many homeowners forget to monitor the water level during the peak of summer. While ollas are remarkably efficient, they are not infinite; allowing a pot to sit empty for several days in a heatwave can cause the surrounding soil to shrink and pull away from the pot wall, breaking the necessary hydraulic connection.
Seasonal Maintenance
Seasonal care is vital for preserving the longevity of the clay vessels. During the Spring, the focus should be on cleaning the interior of the pots. Mineral deposits from hard water can occasionally clog the pores of the clay, reducing its efficiency. A mild solution of vinegar and water can be used to flush the system and restore porosity before the heavy growing season begins. This is also the time to inspect the Edging around the pots to ensure that mulch or soil has not encroached on the openings.
In the Summer, maintenance is largely centered on monitoring. As the temperature rises, the rate of Evapotranspiration increases, requiring more frequent refills. A professional landscape consultant might recommend checking levels every three to five days during a drought. In the Autumn, as plants enter dormancy, the water demand will drop significantly. The pots should be cleaned and inspected for any structural cracks caused by shifts in the soil or root pressure.
Winter presents the greatest risk to a traditional clay system. In regions where the ground freezes, the water inside the pot will expand, inevitably shattering the terracotta. To prevent this, the pots should be emptied of all water using a small hand pump or a sponge. In extreme climates, it is often best to dig the pots up entirely and store them in a garage or shed until the ground thaws. If they must remain in the ground, they should be covered with a thick layer of straw or Burlap and capped tightly to keep out snow and ice.
Professional Landscaping FAQ
How far apart should I space my clay pots?
For most vegetable and flower beds, space pots every 3 to 4 feet. This ensures that the moisture plumes overlap sufficiently to cover the entire root zone of the intermediate plantings without leaving dry pockets in the soil.
Can I use liquid fertilizers inside the olla?
It is generally discouraged. Liquid fertilizers can contain salts and minerals that may eventually clog the microscopic pores of the unglazed clay. It is better to apply organic compost or top-dress fertilizers to the soil surface around the pot instead.
What size olla is best for a standard raised bed?
For a 4×8 foot raised bed, two 2-gallon pots are usually sufficient. The goal is to provide enough reservoir capacity to last several days while ensuring the diameter of the pot does not displace too much planting space.
How do I know if the pot is working?
Check the soil moisture approximately 6 inches away from the buried pot. If the pot is functioning correctly, the soil should feel consistently cool and damp, even if the top inch of the surface mulch appears completely dry to the touch.
Will my plants roots break the clay pot?
Most soft-stemmed perennials and vegetables have non-invasive roots that will hug the pot without damaging it. However, you must avoid planting large trees or aggressive woody vines near ollas, as their secondary growth can apply enough pressure to crack the terracotta.