
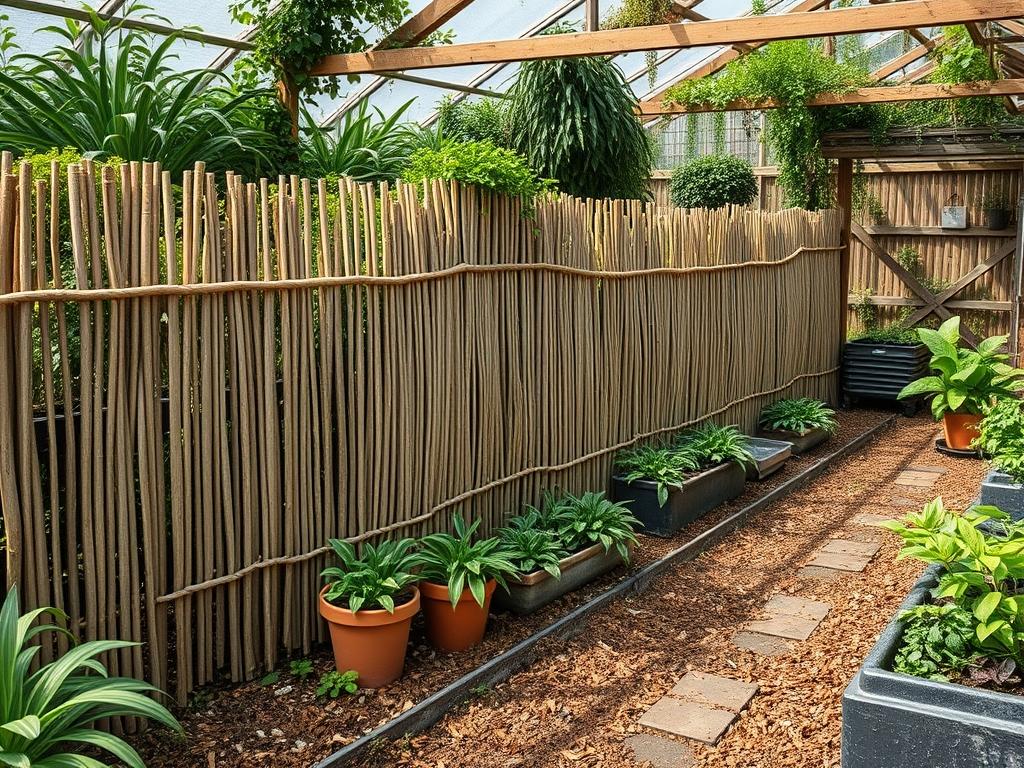
Establishing a functional microclimate within a residential landscape requires more than just high quality soil and a selection of hardy flora. For many property owners, the greatest adversary to garden health is the relentless pressure of prevailing winds. High velocity air currents can lead to rapid desiccation, mechanical damage to fragile stems, and a significant drop in ambient temperature during the shoulder seasons. While solid masonry walls or heavy timber fences provide some protection, they often create turbulent eddies and vacuums that can be just as damaging as the wind itself. This is where the ancient art of traditional reed fencing demonstrates its value. A well constructed reed screen is semi-permeable, allowing approximately 40 percent of the air to pass through its fibers. This filtration breaks the wind force without creating the chaotic air patterns associated with solid barriers. From a design perspective, the organic textures and golden hues of dried reeds offer a sophisticated, natural backdrop that enhances curb appeal and situates the garden within a timeless, ecological aesthetic.
Landscape Design Principles
In professional landscape architecture, every vertical element must serve a dual purpose: functional utility and visual harmony. When integrating traditional reed fencing, we focus on the principle of rhythm and repetition. Because reeds are naturally thin and vertical, they create a fine-textured surface that can make smaller outdoor spaces feel more expansive. We utilize symmetry by mirroring reed panels on opposite sides of a viewing axis, such as a formal Flagstone Walkway, to create a sense of intentionality and order.
Focal points are critical when working with such a detailed texture. A reed screen should not merely be a boundary; it should be a canvas. By placing a dark-leaved specimen plant or a stark white marble sculpture against the light-colored reeds, we create a high-contrast focal point that draws the eye through the landscape. Elevation layers play a significant role here as well. We typically recommend a tiered approach where the reed fence serves as the tallest, outermost layer. Moving inward, we transition to mid-sized shrubs and then to low-lying perennials or groundcovers. This creates a green amphitheater effect that maximizes visual depth.
Furthermore, the placement of these structures must account for seasonal sun angles. Because reed fencing has a specific density, it casts a dappled, soft shadow that can protect shade-loving plants from the harsh afternoon sun in mid-summer. Design planners must also integrate irrigation systems early in the process. Drip lines should be tucked behind the base of the fencing to ensure that the moisture reaches the root zones of the “windbreak” plants without causing premature rot in the organic fencing material itself.
Plant and Material Selection
Choosing the right components to accompany your fencing project ensures long term stability and aesthetic cohesion. The following table outlines optimal plant choices and materials for a wind-protected landscape.
| Plant or Material | Sun Exposure | Soil Needs | Water Demand | Growth Speed | Maintenance Level |
| :— | :— | :— | :— | :— | :— |
| Switchgrass | Full Sun | Sandy/Loam | Low | Fast | Low |
| Lavender | Full Sun | Well-Drained | Low | Moderate | Moderate |
| Japanese Maple | Partial Shade | Acidic/Rich | Moderate | Slow | High |
| Common Reed | Full Sun | Wet/Marshy | High | Very Fast | Moderate |
| Boxwood | Sun to Shade | Well-Drained | Moderate | Slow | Moderate |
| Pressure Treated Post | N/A | Concrete Set | N/A | N/A | Low |
| Galvanized Wire | N/A | N/A | N/A | N/A | N/A |
Implementation Strategy
The actual weaving and installation of traditional reed fencing require a systematic approach to ensure the structure survives heavy gusts and heavy precipitation. The process begins with site grading. The ground must be leveled and sloped slightly away from the fence line to prevent standing water, which is the primary cause of foot-post failure. We recommend installing 4×4 pressure-treated timber posts at intervals of precisely 6 feet. These posts should be sunk at least 24 inches into the ground and secured with a quick-setting concrete mix.
Once the skeleton of the fence is established, the weaving begins. Authentic reed fencing is often hand-woven using 14-gauge galvanized wire or copper wire for increased corrosion resistance. The technique involves bundling approximately 15 to 20 individual reeds (Phragmites australis) into a vertical “stave.” We then use a continuous strand of wire to perform a figure-eight wrap around each bundle, securing it to the horizontal structural rails of the fence frame. It is vital to maintain high tension on the wire using linesman pliers to prevent the reeds from sagging or shifting over time.
For maximum wind protection, we suggest a double-weave method where two layers of reeds are offset by 1 inch. This creates a denser barrier while still maintaining the essential permeability. At the base of the fence, leave a 2-inch gap between the bottom of the reeds and the ground or mulch. This gap prevents the reeds from wicking up moisture from the soil, which drastically extends the lifespan of the organic material. To finish the base, we use an aluminum edging strip or a layer of 3-inch deep cedar mulch to create a clean, professional transition between the fence and the garden beds.
Common Landscaping Failures
The most frequent mistake in reed fence installation is the failure to account for drainage. Many DIY enthusiasts place the reeds directly on the soil surface, leading to fungal growth and structural collapse within two seasons. Another common error is root overcrowding at the base of the fence. Because the reed screen provides a sheltered environment, gardeners often over-plant the area, leading to poor air circulation and powdery mildew on the foliage.
Improper spacing of support posts is another critical failure point. In high-wind corridors, a 6-foot span is the absolute maximum; exceeding this will cause the reed mats to “parachuting,” where they catch the wind and pull away from the wire ties. We also frequently observe soil compaction issues. During the construction of the fence, heavy foot traffic can compress the soil near the plant beds. It is essential to use aeration tools or a garden fork to loosen the soil and incorporate organic compost once the construction phase is complete. Lastly, many fail to calibrate their irrigation. Sprinkler heads should never spray directly onto the reed fencing, as the constant wetting and drying cycles will cause the reeds to become brittle and grey prematurely.
Seasonal Maintenance
To keep a traditional reed-fenced landscape in peak condition, a quarterly maintenance schedule is necessary. In the spring, inspect all wire ties for signs of rust or loosening. This is also the time to apply a high-nitrogen fertilizer to the surrounding plants to support the new growth spurred by the sheltered microclimate. As summer arrives, the focus shifts to irrigation management. Ensure that the drip emitters are functioning correctly and that the mulch depth remains at at least 3 inches to conserve moisture during heatwaves.
Autumn is the season for structural reinforcement. Before the winter gales arrive, check the verticality of the anchor posts. If any leaning is detected, it may be necessary to add a 2×4 diagonal brace on the leeward side. If the reeds have darkened significantly, a light cleaning with a soft brush can remove dust and debris. During winter, the primary concern is snow load. If heavy, wet snow accumulates against the reed screen, use a soft broom to gently knock it off. While the reeds are naturally durable, excessive weight can snap the delicate fibers. Finally, winter is the best time to prune any overhanging tree limbs that might rub against the fence and cause mechanical wear.
Professional Landscaping FAQ
How long does a traditional reed fence typically last?
A professionally installed reed fence generally lasts between 5 to 8 years. Its lifespan depends heavily on local humidity levels and whether the reeds are kept from touching the damp soil. Regular inspections and proper drainage are key to reaching the maximum duration.
Can I use reed fencing on a sloped property?
Yes, but you must step the panels rather than angling them. Install each section horizontally at a different elevation to follow the grade. This maintains the structural integrity of the woven wire and ensures a clean, architectural look across the landscape.
Is reed fencing effective for noise reduction?
While reeds are excellent for wind filtration, they are less effective for sound dampening than solid masonry. However, by breaking up sound waves and providing a visual barrier, they can create a perceived sense of privacy and quiet in a busy suburban backyard.
What is the best way to clean reed panels?
Avoid using high-pressure power washers, as they will shred the fibers. Instead, use a garden hose on a gentle setting and a soft-bristled brush. This removes environmental pollutants and mold spores without damaging the galvanized wire or the reeds themselves.
Do I need a permit for reed fencing?
Most municipalities treat reed fencing as a decorative screen. However, if it exceeds 6 feet in height or is attached to a permanent structural boundary, you should check local building codes regarding wind-load requirements and setbacks from property lines.