
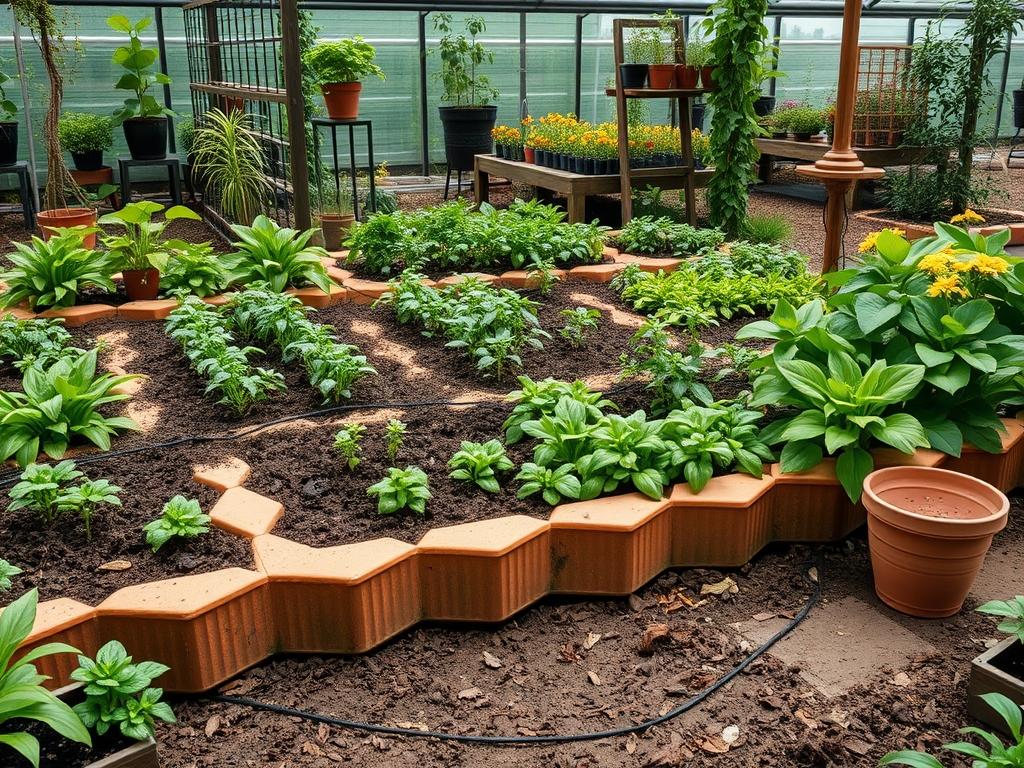
A well-defined border serves as the architectural skeleton of any high-end landscape design. When homeowners and developers seek a balance between historical elegance and structural permanence, Traditional Clay Bed Edging remains an unrivaled choice. Unlike plastic or thin metal alternatives that warp under the intensity of the summer sun, fired clay offers a dense, earthen weight that grounds the garden. This material choice is particularly crucial in climates characterized by heavy rainfall or significant freeze-thaw cycles. Properly installed clay edging prevents the migration of turf grass into ornamental beds and provides a crisp masonry line that enhances curb appeal. From a functional standpoint, it establishes a clear maintenance boundary that protects delicate perennials from the mechanical blades of string trimmers and mowers.
Landscape Design Principles
Successful garden planning relies on the fundamental concept of spatial definition. Traditional Clay Bed Edging acts as the visual transition between the softscape elements, such as lawns and floral borders, and the hardscape elements like walkways or patios. To achieve a professional finish, designers prioritize symmetry and repetition to guide the eye through the environment. When laying out bed lines, one should consider the focal points of the property. For example, a curvilinear clay border can soften the rigid angles of a modern home, whereas straight, parallel lines of Victorian rope-top edging reinforce the formality of traditional estates.
Elevation layers play a vital role in how the edging is perceived. By slightly elevating the planting bed behind the clay border, a designer creates a natural stage for plant life. This technique, often referred to as “crowning” a bed, ensures that mulch does not wash over the masonry during heavy storms. Furthermore, the selection of edging must account for irrigation planning. Clay is porous, and while fired bricks are highly water-resistant, the substrate beneath them must allow for proper percolation. If the landscape lacks a slight gradient for drainage, water may pool against the edging, eventually causing the soil to become anaerobic and damaging the root systems of nearby Buxus sempervirens or other sensitive shrubs.
A cohesive landscape also utilizes walkways as a means of connectivity. Traditional Clay Bed Edging should ideally mirror or complement the material used in these paths. If the home features a brick facade, selecting a clay edge in a slightly different hue can provide a sophisticated contrast without clashing. Visual balance is maintained by ensuring the height of the edging is consistent. A professional installer uses a string line and a spirit level to ensure the top edge of the clay follows the natural contour of the land while maintaining a smooth, professional grade.
Plant and Material Selection
Choosing the right vegetation to sit behind your clay border is essential for long-term aesthetics. The following table provides a guide for selecting plants that thrive in well-defined traditional beds.
| Plant Type | Sun Exposure | Soil Needs | Water Demand | Growth Speed | Maintenance Level |
| :— | :— | :— | :— | :— | :— |
| English Boxwood | Full Sun to Part Shade | Well-drained, Loamy | Moderate | Slow | Low (Requires Pruning) |
| Lavender (Munstead) | Full Sun | Sandy, Gritty | Low | Medium | Low |
| Hydrangea Macrophylla | Part Shade | Rich, Organic | High | Fast | Medium |
| Japanese Forest Grass | Shade | Moist, Fertile | Moderate | Medium | Low |
| Hostas (Various) | Shade | Adaptable | Moderate | Fast | Low |
| Dwarf Fountain Grass | Full Sun | Well-drained | Low | Medium | Low |
For the edging material itself, specify heavy-fired clay pavers or terracotta rope-top tiles. These materials have low water absorption rates, meaning they will not crumble or flake during the winter months. You will also need 3/4-inch minus crushed stone for the base and masonry sand for the leveling layer to ensure the structure remains stable for decades.
Implementation Strategy
The process begins with a detailed site analysis to determine the “drip line” of existing trees and the location of underground utilities. Once the layout is confirmed using marking paint, the first physical step is the excavation of a trench. For standard clay edging, the trench should be approximately 6 inches wide and 8 inches deep. This depth allows for a 3-inch mineral base of compacted gravel, which is vital for preventing frost heave.
After the trench is cleared of all roots and debris, pour the crushed stone and compact it thoroughly using a hand tamper. On top of this base, add a 1-inch layer of masonry sand. This sand acts as a “screed” layer, allowing you to micro-adjust the height of each clay unit. As you set the clay tiles or pavers, use a rubber mallet to tap them into place. Do not use a metal hammer, as this will shatter the fired clay. Ensure each piece is butt-jointed tightly against the next to minimize gaps where weeds could penetrate.
Once the course of edging is set, backfilling is the most critical step for stability. On the lawn side of the edging, use a heavy clay-based soil or sod to pin the units in place. On the garden side, apply a high-quality hardwood mulch at a depth of 3 inches. This mulch should sit slightly below the top rim of the clay to provide a clean visual “reveal.” Ensure the grading slopes away from the edging at a minimum 2 percent grade to facilitate drainage. If the area is prone to saturation, consider installing a French drain or a 4-inch perforated pipe parallel to the bed to whisk excess moisture away from the masonry foundation.
Common Landscaping Failures
The most frequent mistake in traditional edging design is the omission of a proper sub-base. Many DIY enthusiasts and inexperienced contractors simply push clay units into the raw topsoil. Without a compacted gravel layer, the weight of the clay combined with soil moisture will cause the edging to sink or tilt unevenly within a single season. This leads to a jagged, unsightly line that is difficult to fix without a full reconstruction.
Another common failure is root overcrowding. When planting large shrubs or trees too close to the clay border, the expanding root systems will eventually exert lateral pressure on the edging. This can dislodge the clay units and crack the joints. Designers must plan for the “mature width” of a plant rather than its size at the time of purchase. Soil compaction is also a hidden enemy. If the soil surrounding the edging is overly compacted during construction, irrigation water will not penetrate the ground, leading to surface runoff that erodes the mulch and undermines the hardscape.
Improper irrigation placement can also lead to failure. If sprinkler heads are positioned to spray directly against the vertical face of the clay edging, the constant moisture can lead to the growth of moss and algae, or in some cases, the leaching of minerals from the clay. Ensure that irrigation systems are calibrated to provide deep saturation to the root zones of the plants without drenching the masonry foundations.
Seasonal Maintenance
A clay-edged garden is a living system that requires periodic attention to maintain its “Day 1” appearance. In the spring, perform a “frost heave check.” Inspect the line of the clay for any units that have shifted during the winter thaws. Gently lift these units, add a small amount of masonry sand to level them, and reset them with a rubber mallet. This is also the time to apply a fresh layer of mulch to maintain the proper depth and suppress early-season weeds.
During the summer, the primary focus shifts to hydration and edge definition. Use a pair of manual grass shears to trim any stray blades of turf that the mower cannot reach near the clay. Avoid using chemical herbicides near the edging, as the runoff can stain the clay or seep into the porous surface. In the autumn, clear away fallen leaves and organic debris that can trap moisture against the clay. If left through the winter, decomposing leaves can cause tannin staining on lighter-colored clay tiles.
When winter arrives, the main goal is protection from mechanical damage. If you use a snowblower or a metal shovel, mark the location of your clay edging with reflective stakes. Impact from a snowplow blade will easily shatter traditional clay. Avoid using rock salt or chemical de-icers near the bed edging, as the salt crystals can penetrate the clay and cause “spalling,” where the face of the tile flakes off due to internal pressure. Use coarse sand for traction instead.
Professional Landscaping FAQ
How deep should I bury my clay edging?
Typically, you should bury at least one half to two thirds of the clay unit. This depth ensures the edging remains anchored against the lateral pressure of soil and prevents it from shifting when bumped by lawn equipment.
Can I install clay edging on a steep slope?
Yes, but it requires a “stair-step” installation method. Each section must be set horizontally level, with small vertical offsets to follow the grade. This prevents the edging from sliding downhill and helps manage water runoff effectively.
What is the best way to cut clay pavers?
For clean, professional results, use a power saw with a diamond blade. Always wear safety goggles and a dust mask. For traditional rope-top tiles, a manual tile nipper can be used for small adjustments around curves.
Does clay edging require a concrete footer?
In standard residential gardens, a compacted gravel and sand base is sufficient. However, for retaining walls or high-traffic commercial zones, a thin concrete “haunch” or footer may be necessary to provide additional structural stability.
Why is my clay edging turning white?
This is likely “efflorescence,” a natural process where soluble salts move to the surface of the masonry. It can usually be removed with a stiff-bristled brush and clean water. It typically fades as the material weathers over time.