
Integrating native cactus varieties into a residential or commercial landscape is one of the most effective ways to reconcile aesthetic ambition with environmental responsibility. As water scarcity becomes a primary driver in urban planning and residential design, the shift toward xeric environments has moved from a niche preference to a standard architectural requirement. Native cactus varieties offer a unique architectural silhouette that many traditional temperate plants cannot replicate, providing structural permanence that remains consistent throughout the shifting seasons. The primary landscaping challenge lies in managing the transition from high-water turf areas to low-moisture zones without creating a disjointed visual experience. Successful cactus integration requires a deep understanding of site-specific microclimates, subterranean drainage profiles, and the logical flow of outdoor living spaces. By utilizing these resilient species, a designer can improve curb appeal while significantly reducing long term maintenance costs and resource consumption.
Outdoor functionality is another critical pillar of native cactus landscaping. Beyond their visual appeal, these plants serve as natural barriers, windbreaks, and heat-absorbing masses that can help regulate the temperature of a building envelope. When planned correctly, a cactus garden serves as a high-performance outdoor environment that supports local biodiversity while providing a sophisticated, sculptural backdrop for human activity. Proper planning ensures that spines and thorns are kept away from high-traffic pedestrian corridors, such as narrow walkways or seating areas, thereby maximizing the safety and utility of the property.
Landscape Design Principles
Effective landscape design for native cactus varieties relies on the careful manipulation of symmetry and focal points to create a sense of intentionality. Because many cacti possess unconventional shapes, they can easily appear cluttered if scattered without a structural framework. A designer should identify a primary specimen, such as a large Saguaro or a mature Organ Pipe, to serve as a central anchor. Secondary plants should then be arranged in odd-numbered clusters to promote a naturalized look, using the principle of repetition to guide the eye across the terrain.
Elevation layers are perhaps the most vital tool in the desert architect’s kit. Cacti rarely thrive on flat, featureless ground. By creating berms and mounds using subterranean fill and structural soil, you can introduce vertical interest and, more importantly, facilitate essential drainage. These elevation changes allow for the layering of plants based on their growth habits. Low-growing species like Claret Cup or Mammillaria should occupy the foreground, while mid-sized varieties like Gila Prickly Pear populate the mid-ground.
Irrigation planning must be invisible yet highly efficient. While native cacti are drought-tolerant, they require supplemental water during the establishment phase, which typically lasts two years. Sub-surface drip systems are preferred, as they deliver moisture directly to the root zone without promoting fungal growth on the plant’s epidermis. Walkways should be designed to complement the desert aesthetic, utilizing permeable materials such as Decomposed Granite or flagstone. These materials allow water to infiltrate the soil rather than creating runoff, maintaining the hydrological balance of the site. Visual balance is achieved by contrasting the rigid, vertical forms of the cacti with the softer textures of native grasses or desert shrubs, creating a dialogue between different botanical structures.
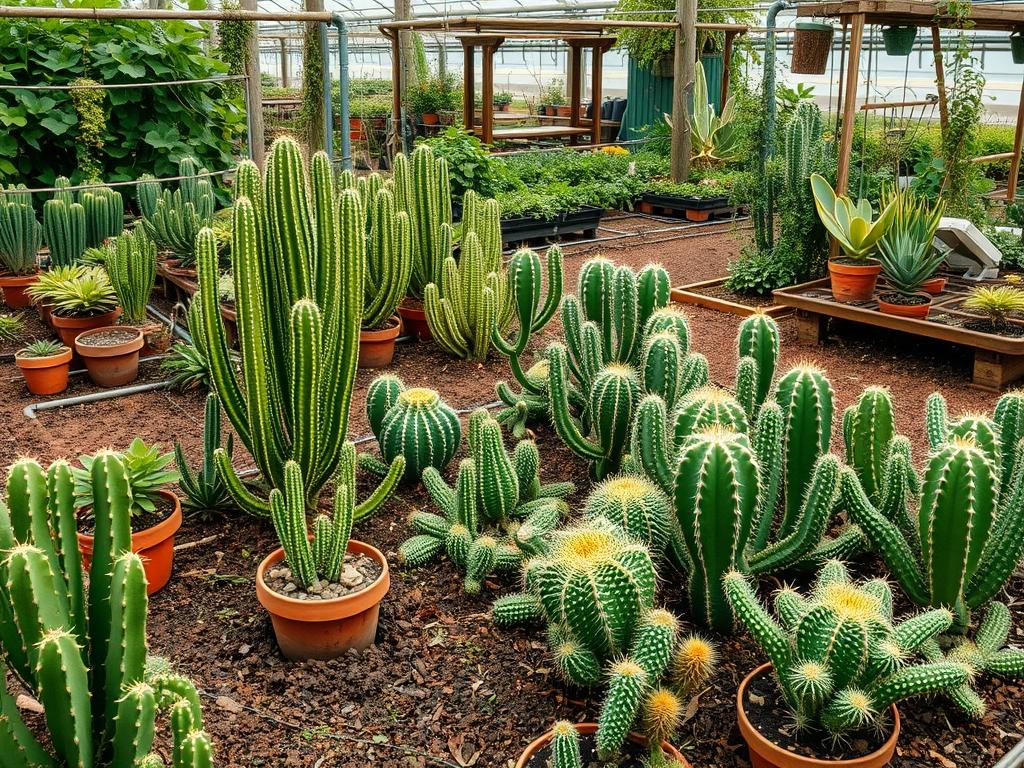
Plant and Material Selection
Selecting the right plant for the right location is the difference between a thriving ecosystem and a failing garden. The following table outlines primary native species and their technical requirements for professional-grade landscapes.
| Plant Type | Sun Exposure | Soil Needs | Water Demand | Growth Speed | Maintenance Level |
| :— | :— | :— | :— | :— | :— |
| Prickly Pear (Opuntia) | Full Sun | Sandy/Rocky | Very Low | Fast | Low |
| Barrel Cactus (Ferocactus) | Full Sun | Well-Drained | Low | Slow | Very Low |
| Saguaro (Carnegiea) | Full Sun | Rocky/Mineral | Infrequent | Very Slow | Minimal |
| Cholla (Cylindropuntia) | Full Sun/Part Shade | Lean/Gravelly | Low | Medium | Moderate |
| Hedgehog Cactus (Echinocereus) | Full Sun | Grit-Heavy | Low | Slow | Low |
| Agave (Technically Succulent) | Full Sun to Shade | Well-Drained | Low | Medium | Low |
For hardscaping materials, professionals should focus on 3/4-inch crushed rock, lava rock, and river cobble. These materials serve as inorganic mulch, which suppresses weeds and prevents moisture evaporation without the risk of rot common to wood-based mulches. The use of landscape boulders is also recommended to provide thermal mass and mimic the natural outcroppings found in the plant’s native habitat.
Implementation Strategy
The transition from a design on paper to a physical landscape requires a systematic approach to site preparation. The first phase is grading and drainage. A professional layout must ensure a 2% to 3% slope away from building foundations to prevent water pooling. If the natural soil is heavy clay, it must be amended. A common mistake is adding sand to clay, which creates a concrete-like substance. Instead, incorporate expanded shale, pumice, or fine gravel to increase macropolarity and ensure oxygen can reach the root systems.
Once the sub-grade is established, the placement of large structural elements comes next. Boulders should be partially buried, often between 30% and 50% of their volume, to give the appearance that they are emerging from the earth rather than simply sitting on top of it. This provides a sense of geological permanence. After the boulders are set, the largest “specimen” cacti are installed. When handling these plants, professional-grade rubber-backed gloves and carpet remnants are essential for protecting both the worker and the plant’s delicate skin.
The planting hole should be twice as wide as the root ball but no deeper. Placing a cactus too deep in the soil is a primary cause of stem rot. Once the plants are in the ground, a layer of weed barrier fabric is discouraged in favor of heavy mineral mulching. A 3-inch to 4-inch layer of rock mulch provides superior breathability. Edging should be performed using Corten steel or concrete curbing to define the boundaries between the cactus beds and other landscape features, such as gravel paths or driveways. Finally, the installation of the irrigation system should involve placing emitters at the edge of the root ball, not against the trunk, to encourage outward root expansion.
Common Landscaping Failures
The most frequent failure in native cactus gardens is improper drainage. When water sits around the base of a cactus for more than a few hours, the plant is susceptible to various fungal pathogens. Soil compaction is another silent killer; heavy machinery used during construction often collapses the air pockets in the soil, preventing the rapid drainage these plants require. It is vital to tilling and aerate the soil before planting happens.
Improper spacing is a common aesthetic and functional error. Many homeowners underestimate the mature width of Opuntia varieties, leading to root overcrowding and the need for frequent, dangerous pruning. Each plant needs enough “psychological space” to be viewed as an individual specimen. Furthermore, irrigation inefficiencies often stem from treating cacti like traditional perennials. Over-watering during the winter dormancy period can cause the plant to split or rot from the inside out. Finally, using organic mulches like wood chips near cacti should be avoided because they retain too much humidity and can harbor pests that may damage the plant’s base.
Seasonal Maintenance
Seasonal management of a cactus landscape is significantly less intensive than traditional gardening but requires specific timing. During the spring, the focus is on growth support. This is the ideal time to apply a low-nitrogen, high-phosphorus fertilizer to encourage blooming. Pruning should also occur in late spring to remove any pads or stems damaged by winter frost. Use sharpened loppers and sanitize them with isopropyl alcohol between cuts to prevent the spread of disease.
As summer heat intensifies, monitor young plants for signs of sunburn. In extreme climates, temporary shade cloth providing 30% to 50% sun blockage can protect newly installed specimens until they harden off. Autumn is the period for cleaning. Remove fallen leaves from deciduous trees that may have become trapped between cactus spines, as these can trap moisture and cause rot points. Irrigation schedules should be gradually scaled back as the days shorten and temperatures drop.
In winter, the primary goal is frost protection for sensitive species. While many native cacti are cold-hardy, younger plants or specific varieties may require frost blankets or burlap wraps during a hard freeze. Never use plastic directly against the plant, as it traps moisture and can conduct cold. Ensure that the soil remains dry during the winter months, as cold and wet together are far more lethal to cacti than cold alone.
Professional Landscaping FAQ
How often should I water my newly planted cactus?
During the first summer, water once every ten to fourteen days. Allow the soil to dry completely between applications. Gradually reduce this frequency over two years until the plant survives primarily on natural rainfall and occasional deep soakings.
What is the best way to handle large, spiny cacti safely?
Utilize long heavy-duty tongs, nylon slings, or thick carpet scraps to grip the plant. Never use metal chains or thin wire, as these can pierce the cactus skin, leading to scars or localized infections that compromise the plant’s health.
Can I grow native cacti in areas with heavy clay soil?
Yes, but you must modify the site. Create raised planting beds or mounds at least 12 inches high using a mix of 70% mineral grit and 30% native soil. This ensures the root crown stays above the saturation zone.
Why is my cactus turning yellow or brown at the base?
This is often a sign of “corking,” which is a natural aging process where the base turns woody to support the plant’s weight. However, if the area is soft or mushy, it indicates rot caused by over-irrigation or poor drainage.
What should I use for the top layer of my cactus garden?
A 2-inch to 4-inch layer of crushed stone or decomposed granite is ideal. This inorganic mulch regulates soil temperature, prevents weed germination, and provides a professional, finished aesthetic that complements the structural forms of the native cactus varieties.