
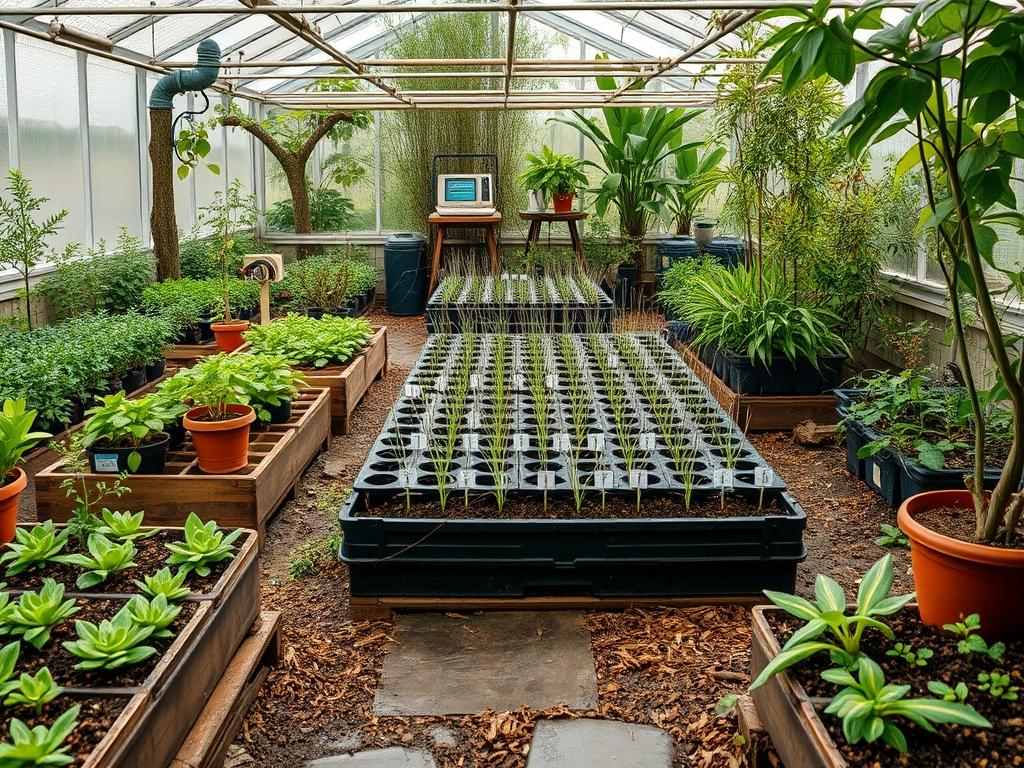
Establishing a legacy landscape begins long before the first shovel hits the dirt. In the world of high-end outdoor design, the most resilient and visually stunning environments often rely on the biological integrity of native species grown from the ground up. Native Tree Seed Stratification is the essential bridge between a dormant seed and a thriving canopy. For the modern homeowner or developer, understanding this process is not merely a botanical exercise; it is a strategic investment in curb appeal and ecological stability. Trees that are started from seed on-site or in local conditions often develop superior root systems compared to their container-grown counterparts, which may suffer from girdling or heat stress in nursery environments. By mastering the art of cold treatment, we can ensure that a planned grove of White Oaks or Sugar Maples achieves the structural goals of the original site plan while offering the environmental benefits that only indigenous flora can provide.
A thoughtfully designed outdoor space balances functional zones with aesthetic rhythm. When we plan for the long-term growth of native trees, we must account for the specific climate transitions used to trigger germination. In the temperate regions of the northern hemisphere, most native hardwoods have evolved a survival mechanism that prevents them from sprouting during a warm autumn week only to be killed by a sudden frost. This internal clock, driven by hormones like abscisic acid, requires a specific period of cold and moisture to break dormancy. As landscape architects, we view this waiting period as an opportunity to refine the site grading and prepare the irrigation infrastructure. Integrating trees that have been properly stratified into the design ensures a higher survival rate, meaning the focal points, symmetry, and elevation layers defined in the initial blueprint remain intact for decades.
Landscape Design Principles
Successful landscape design relies on the intentional placement of vertical elements to guide the eye and define the perimeter. When utilizing trees grown through Native Tree Seed Stratification, we consider the eventual height and width of the mature specimen. Symmetry can be achieved by using identical species to flank a driveway or a grand entryway, but this requires uniform germination. By controlling the stratification process, a designer can ensure that a cohort of trees is ready for planting at the exact same stage of development. Focal points are often created using specimen trees like the Eastern Redbud or the Flowering Dogwood, which offer seasonal color and structural interest at the understory level.
Elevation layers are another critical component of a professional site plan. We utilize a tiered approach, placing taller canopy trees at the property boundary to provide privacy and windbreaks while situating smaller, more ornamental trees closer to the residence. This creates a sense of depth and enclosure that makes a garden feel like an outdoor room. Irrigation planning must also be synchronized with the life cycle of these seeds. A young sapling emerging from a stratified seed has different moisture requirements than an established shrub. We design irrigation zones that cater to these developing root zones, using drip lines or micro-sprayers to maintain a consistent 2-inch moisture depth without over-saturating the soil and inviting rot.
Visual balance is further enhanced by the use of walkways and hardscaping that complement the organic forms of the trees. A winding path of decomposed granite or natural flagstone provides a structured counterpoint to the soft, swaying limbs of native birches or poplars. By planning the location of these paths during the stratification period, we can ensure that the soil compaction necessary for stable walkways does not interfere with the future root expansion of our native plantings.
Plant and Material Selection
| Plant Type | Sun Exposure | Soil Needs | Water Demand | Growth Speed | Maintenance Level |
| :— | :— | :— | :— | :— | :— |
| White Oak | Full Sun | Deep, Loamy | Moderate | Slow | Low |
| Sugar Maple | Full Sun/Part Shade | Well-Drained, Rich | Moderate | Medium | Low |
| Eastern Redbud | Part Shade | Adaptable/Moist | Moderate | Fast | Medium |
| Pawpaw | Shade (Young) | Rich, Alluvial | High | Slow | Medium |
| Bald Cypress | Full Sun | Wet, Acidic | High | Fast | Low |
| Black Walnut | Full Sun | Deep, Fertile | Moderate | Fast | Moderate |
| American Beech | Part Shade | Moist, Silty | Moderate | Slow | High |
Implementation Strategy
The purest way to initiate Native Tree Seed Stratification involves mimicking the natural forest floor within a controlled environment. We begin by collecting or sourcing high-quality seeds in the late summer or fall. For many species, such as the Red Oak, a period of 60 to 90 days of cold moist stratification is required. We use a medium consisting of a 1:1 ratio of sphagnum peat moss and coarse sand or perlite. This mixture allows for gas exchange while retaining the critical moisture needed to soften the seed coat. The seeds are placed in a polyethylene bag or a plastic container with small ventilation holes and stored in a refrigerated environment kept between 34 and 41 degrees Fahrenheit.
While the seeds are undergoing their cold treatment, the physical landscape must be prepared. Grading is the first priority; the land must be sloped away from structures at a minimum of a 2-percent grade to ensure proper drainage. Excess water around a newly planted native seed can lead to damping off, a fungal disease that kills young seedlings. Once the grading is finalized, we define the planting beds using steel edging or poured concrete borders to prevent turf grass from encroaching on the tree zones.
When spring arrives and the seeds begin to show signs of radicle emergence, they are moved to the field or a dedicated nursery bed. We excavate a small hole, typically twice the depth of the seed’s diameter, and place the seed with the developing root facing downward. A layer of natural hardwood mulch at a depth of 2 to 3 inches is applied to the surface to regulate soil temperature and suppress weeds. It is vital to keep the mulch a few inches away from the direct stem of the seedling to prevent bark decay.
Common Landscaping Failures
One of the most frequent mistakes in native tree propagation is the failure to address drainage. If a site has heavy clay soil, the stratified seed may drown during high spring rainfall. We mitigate this by incorporating amended organic matter or installing French drains in low-lying areas. Another common issue is root overcrowding, often seen when seeds are started in pots that are too small. This leads to circling roots that will eventually choke the tree as it matures. Direct sowing in the final landscape position is often the better architectural choice if the site can be protected from foraging wildlife.
Improper spacing is a critical design failure that manifests years down the line. A Sycamore might look small in a 1-gallon container, but its eventual 60-foot spread must be accounted for in the initial site plan. Placing trees too close to house foundations or power lines creates a maintenance nightmare and potential liability. Furthermore, soil compaction from heavy machinery during the construction phase can prevent the delicate roots of a newly stratified seed from penetrating the earth. We recommend using pneumatic soil aeration or deep tilling in planting zones before the seeds are introduced to ensure a porous environment for root development.
Seasonal Maintenance
Landscape management is a year-round commitment that changes with the biological needs of the trees. In the spring, the focus is on monitoring the emergence of the stratified seeds and ensuring they are protected from late-season frosts. We may use frost blankets or cloches for particularly sensitive species. This is also the time to apply a balanced, slow-release fertilizer if soil tests indicate a nutrient deficiency.
Summer maintenance revolves around hydration and heat management. Young native trees require consistent moisture during their first two growing seasons. We recommend a deep watering schedule twice a week, providing roughly 1 inch of water per session, rather than frequent shallow watering. This encourages the roots to grow deep into the soil profile.
In the autumn, we focus on protection. As the trees enter dormancy, we apply a fresh layer of bark mulch to insulate the root zone. This is also the ideal time to install wire mesh guards around the trunks of young saplings to protect them from deer and rodent damage during the winter months. Winter is the season for structural pruning on older trees, but for our newly sprouted native species, it is a time of rest and continued root stabilization beneath the frost line.
Professional Landscaping FAQ
How long does stratification usually take?
Most native tree seeds require between 30 and 120 days of cold exposure. The specific duration depends on the species; for example, Sugar Maples typically need about 90 days to break dormancy effectively.
Can I stratify seeds directly in the ground?
Yes, this is known as natural stratification. Plant the seeds in the fall at a depth of 1 to 2 inches and cover them with hardware cloth to prevent squirrels and mice from digging them up over winter.
What is the best medium for indoor stratification?
A sterile mixture of moistened peat moss and vermiculite is ideal. It holds moisture without becoming soggy, which reduces the risk of fungal growth and mold that can destroy the seed embryo during the cold months.
Why did my stratified seeds fail to sprout?
Failure often results from the seeds drying out during the cold period or being kept too wet, leading to rot. Additionally, some seeds have a double dormancy and require a period of warmth followed by a second cold treatment.
When is the best time to transplant seedlings?
If you started seeds in a controlled environment, transplant them after the last hard frost. Ensure they have at least two sets of true leaves and introduce them to outdoor sunlight gradually to avoid transplant shock.