
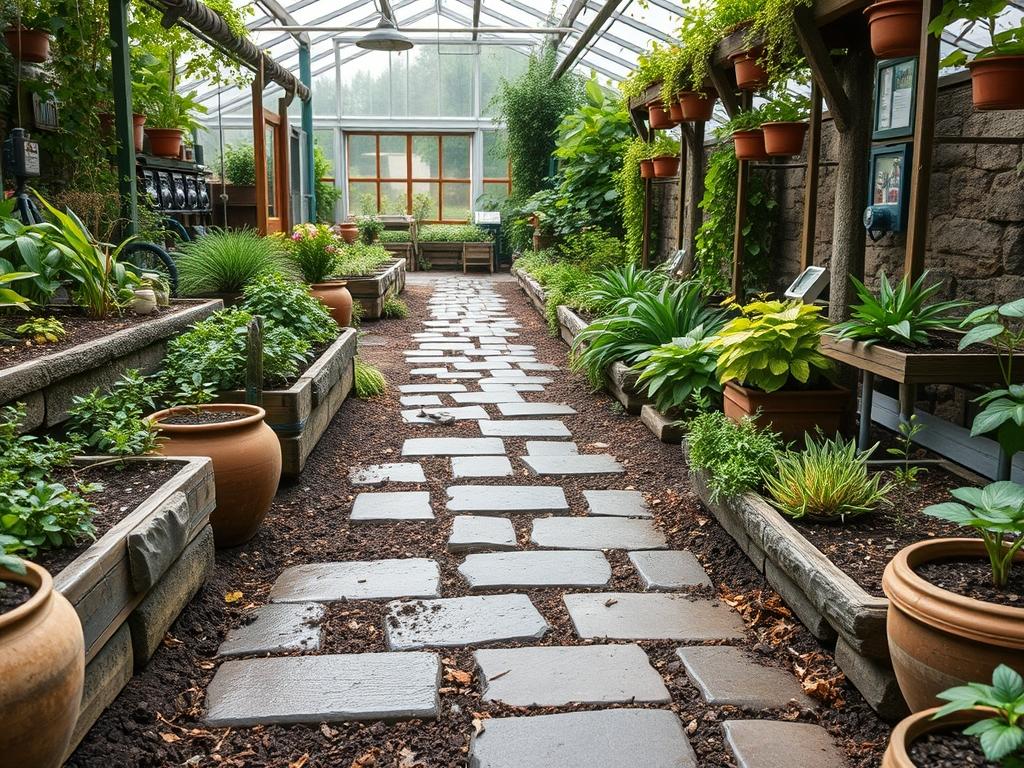
Integrating reclaimed materials into a modern landscape requires a delicate balance between historical aesthetics and contemporary engineering. When we specify reclaimed elements for a project, we are not simply choosing a floor covering; we are selecting a narrative of durability and permanence that new manufactured materials often fail to replicate. Traditional stone paving, sourced from salvaged city streets, old mill floors, or historic estates, brings a weathered patina that immediately anchors a property into its environment. This approach solves a primary landscaping challenge: the “new house” syndrome where a garden feels detached from its surroundings. Beyond visual appeal, using reclaimed stone is an exercise in sustainability and resourcefulness. It minimizes the carbon footprint associated with quarrying and shipping new stone while providing a surface that has already proven its resilience against the elements for decades.
Climate considerations remain paramount when designing with stone. In regions subject to heavy freeze-thaw cycles, the porosity of the material dictates its longevity. Reclaimed Granite Cobbles and dense Yorkstone Flagstones are particularly prized because they resist water absorption, which prevents the cracking and scaling common in lower-quality alternatives. From a curb appeal perspective, a well-executed path of traditional stone paving serves as a structural spine for the landscape. It defines the outdoor functionality of the space by subtly guiding foot traffic and establishing clear boundaries between active transit zones and passive planting beds. To achieve professional results, the architect must consider the elevation of the site to ensure that the heavy masonry does not impede natural water runoff or cause accumulation near the home foundation.
Landscape Design Principles
Effective landscape design starts with the concept of visual weight. Heavy materials like Traditional Stone Paving require a thoughtful layout to ensure they do not overwhelm the softer biological elements of the garden. Symmetry plays a significant role in formal designs; however, reclaimed materials often lend themselves better to an organic, balanced asymmetry. By varying the widths of a path or incorporating subtle curves, a designer can create a sense of discovery. This is further enhanced by establishing focal points. A hand-carved stone bench or a specimen tree like a Japanese Maple positioned at the end of a stone corridor provides a destination, justifying the movement through the space.
Elevation layers are essential for creating depth. A flat garden often lacks interest, so we frequently use stone to create tiered levels. Integrating Natural Stone Retaining Walls allows for the management of slopes while providing flat planting pockets that improve drainage. In these designs, the path itself may act as a subtle terrace. Proper irrigation planning must occur simultaneously with the path layout. Running 20mm HDPE Irrigation Pipes beneath the stone base before installation prevents the need for destructive repairs later. Finally, the principle of walkways should prioritize “desire lines.” If a path does not follow the natural trajectory of how people move, they will eventually cut across the grass, leading to soil compaction and unsightly wear patterns.
Plant and Material Selection
The following table provides a selection of plants and materials that complement the rugged texture of reclaimed stone while addressing various environmental needs.
| Plant or Material Type | Sun Exposure | Soil Needs | Water Demand | Growth Speed | Maintenance Level |
| :— | :— | :— | :— | :— | :— |
| Creeping Thyme | Full Sun | Well-drained | Low | Moderate | Low |
| Boxwood Hedge | Full to Part Sun | Loamy/Rich | Moderate | Slow | Medium |
| Dwarf Mondo Grass | Part Sun to Shade | Moist/Well-drained | Moderate | Slow | Low |
| Reclaimed Yorkstone | N/A | Sub-base | N/A | N/A | Low |
| Granite Setts | N/A | Sub-base | N/A | N/A | Very Low |
| Lavender | Full Sun | Sandy/Alkaline | Low | Moderate | Medium |
| Japanese Forest Grass | Part Shade | Moist/Humus | Medium | Slow | Low |
Implementation Strategy
A successful installation of traditional stone paving begins with rigorous site preparation. First, the area must be excavated to a depth of at least 150mm to accommodate the various layers of the foundation. Grading is the most critical step; the sub-grade must slope away from structures at a minimum of 1:60 ratio to ensure efficient drainage. Once the soil is compacted using a Vibratory Plate Compactor, a layer of Geotextile Fabric is laid down to prevent the sub-base from mixing with the native soil.
The next phase involves laying the Type 1 Crushed Limestone sub-base, which should be roughly 100mm thick and compacted in two layers. This provides the structural integrity required to prevent the stones from shifting over time. For the bedding layer, a moist mix of Sharp Sand and Cement at a 4:1 ratio is applied. When working with reclaimed stone, thicknesses vary significantly from one piece to another. Therefore, the installer must “butter” the back of each stone with a SBR Bonding Agent and individually level each piece into the mortar bed to ensure a flush surface. Edging acts as the frame for the work; we often use Steel Edging or Upright Granite Setts to lock the path in place. Finally, a 20mm layer of organic Bark Mulch is applied to adjacent beds to retain moisture and suppress weeds around the new hardscape.
Common Landscaping Failures
The most frequent failure in stone paving projects involves poor drainage. If water is allowed to pool on the surface or sit in the sub-base, the hydraulic pressure will eventually heave the stones out of alignment. This is often caused by ignoring the natural “fall” of the land or failing to install Perforated Drain Pipes in clay-heavy soils. Another common error is root overcrowding. Planting large, fast-growing trees like Willows or Poplars within 3 Meters of a stone path is a recipe for disaster. The aggressive root systems will eventually lift even the heaviest Yorkstone slabs, cracking the mortar joints and creating a trip hazard.
Improper spacing and soil compaction also plague many DIY and amateur installations. If stones are placed too close together without adequate jointing material, they will rub and chip as the ground naturally expands and contracts. Conversely, if the sub-soil is not professionally compacted, the entire path will settle unevenly within the first two seasons. Irrigation inefficiencies often result from laying stone over existing lines without upgrading to a more robust system. If a leak occurs under a 50mm thick stone slab, the repair costs can be astronomical. It is always better to relocate valves and lines to the perimeter of the paving.
Seasonal Maintenance
Maintaining traditional stone paving requires a proactive approach throughout the year. In the spring, the focus should be on cleaning and inspection. Use a Stiff Bristle Broom and water to remove the salt and grit accumulated during the winter. Check the joints for any missing mortar or “polymeric sand” and replace it immediately to prevent weed seeds from taking hold. This is also the time to apply a balanced fertilizer to the Native Plants lining the path.
Summer maintenance involves managing the moisture levels of the surrounding greenery. Ensure that the Drip Irrigation system is functioning correctly so that the soil adjacent to the stone does not pull away during dry spells, which can cause edge instability. In autumn, the primary task is leaf management. Tannins from rotting leaves can stain certain types of reclaimed limestone or sandstone if left for too long. Clear debris weekly using a Leaf Blower or rake. As winter approaches, prioritize safety without damaging the material. Avoid using harsh rock salt on reclaimed stone, as it can cause chemical weathering. Instead, use Coarse Grit or Sand for traction. Check that all Drainage Grates are clear of debris to prevent ice dams from forming on the stone surface.
Professional Landscaping FAQ
How do I choose the right thickness for reclaimed stone?
Select stones that are at least 50mm thick for pedestrian paths. For driveways, aim for 80mm to 100mm. Consistency is less important than the quality of the bedding mortar, which compensates for varying heights during the installation process.
Can I lay reclaimed stone directly on soil?
No, laying stone on soil leads to rapid sinking and tilting. A structured 100mm sub-base of compacted Type 1 Aggregate is necessary to distribute weight and allow for drainage, ensuring the path remains level for decades.
What is the best way to prevent weeds between stones?
Use a high-quality Polymeric Sand or a Grout specifically designed for outdoor masonry. These materials harden to create a barrier that prevents seeds from reaching the soil while remaining flexible enough to handle thermal expansion.
Is reclaimed stone more expensive than new stone?
Initially, the material costs for reclaimed stone can be 20% to 50% higher due to the labor required for sourcing and cleaning. However, its longevity and timeless value often make it more cost-effective over the lifespan of the garden.
How do I clean heavy stains off old flagstones?
Avoid acidic cleaners which can etch the stone surface. Use a pH-neutral Stone Soap and a Pressure Washer set to a low PSI. For stubborn organic stains, a diluted bleach solution applied with a Soft Scrub Brush is usually effective.