
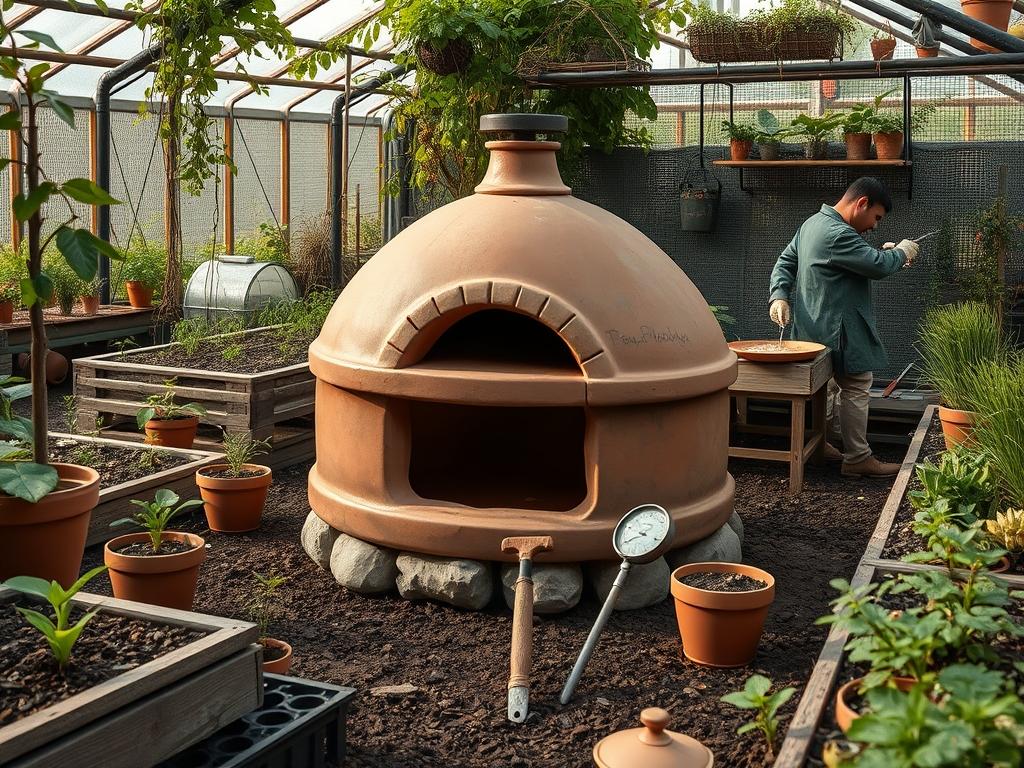
Integrating a traditional clay oven into a residential landscape demands a nuanced balance between aesthetic charm and structural engineering. These earthen structures serve as powerful focal points; however, their weight and heat requirements necessitate careful site selection to ensure both safety and longevity. When planning a garden around such an installation, a landscape architect must evaluate wind direction, surface drainage, and the proximity of flammable foliage. A well placed oven does more than cook food. It anchors the outdoor living space, provides a sense of permanent history, and significantly boosts the functional value of the property. For a successful integration, the designer must treat the oven as part of a larger ecological system. This involves considering how smoke travels across the lawn and how the heat might affect nearby native plants. A poorly positioned hearth can become a nuisance, while a strategically placed one becomes the heart of the home.
The challenge of installing Traditional Clay Ovens often lies in the transition between the hardscape of the cooking area and the softscape of the surrounding garden. One must consider the elevation of the oven mouth to ensure ergonomic use. A hearth that is too low forces the cook to crouch, while one that is too high obscures the view of the surrounding greenery. We often recommend placing the oven on a raised platform or a retaining wall to define the cooking zone clearly. This separation prevents soil from the garden beds from encroaching on the food preparation area. Furthermore, the selection of materials for the surrounding walkways should reflect the rustic nature of the clay. Natural stone, reclaimed brick, or decomposed granite provide a stable surface that complements the organic textures of an earthen oven. By addressing these factors early in the design phase, homeowners can avoid an installation that feels like an afterthought.
Landscape Design Principles
When designing for Traditional Clay Ovens, symmetry and visual balance are paramount. The oven is a heavy, rounded object that naturally draws the eye. To balance this mass, a designer might use a “rule of thirds” approach, placing the oven offset from the center of the patio while using a specimen tree or a large boulder to provide a counterweight on the opposite side. This creates a dynamic tension that feels more natural than rigid, formal symmetry. Focal points should be reinforced through leading lines. Use flagstone paths or carefully pruned hedgerows to guide guests toward the hearth. This intentional movement through the garden enhances the user experience, making the act of outdoor cooking feel like a journey through the landscape.
Elevation layers play a critical role in the functionality of the oven site. Ideally, the oven should sit slightly higher than the surrounding lawn to ensure that water does not pool at the base of the structure. Moist soil is the enemy of raw clay and straw construction. If the landscape is naturally flat, we often create a “pedestal” effect using dry-stack stone or a concrete plinth. This not only protects the oven from rising damp but also creates a tiered aesthetic that allows for integrated seating. Low walls around the oven can serve as “perch seating” for guests, allowing them to stay close to the warmth without interfering with the chef. Irrigation planning must be adjusted around the oven. Sprinkler heads must be positioned to spray away from the oven walls to prevent eroding the exterior plaster or “cob” mixture. Sub-surface drip irrigation is usually the preferred method for nearby garden beds to keep the area dry and stable.
Plant and Material Selection
The following table outlines the best plant species to surround a clay oven area. These selections focus on heat tolerance, utility in cooking, and low maintenance needs.
| Plant Type | Sun Exposure | Soil Needs | Water Demand | Growth Speed | Maintenance Level |
| :— | :— | :— | :— | :— | :— |
| Rosmarinus officinalis | Full Sun | Well-drained, Sandy | Low | Moderate | Low |
| Lavandula angustifolia | Full Sun | Gritty, Alkaline | Low | Moderate | Prune annually |
| Laurus nobilis | Sun to Part Shade | Rich, Loamy | Medium | Slow | Minimal |
| Thymus vulgaris | Full Sun | Poor to Average | Low | Fast | Rare trimming |
| Salvia officinalis | Full Sun | Dry, Sandy | Low | Medium | Deadhead flowers |
| Santolina chamaecyparissus | Full Sun | Poor, Rocky | Very Low | Moderate | Minimal |
In addition to plant life, material selection for the oven itself is vital. Use a mixture of sub-soil clay, sharp sand, and chopped straw to achieve the right structural integrity. For the foundation, compacted gravel at a depth of 6 inches provides a stable base that resists frost heave. The cooking floor should be constructed of high quality firebricks to withstand the intense thermal cycling without cracking. For the finish, a lime-based plaster or a simple clay slip can be used to provide a weather resistant skin.
Implementation Strategy
The process begins with a comprehensive site survey. Use a laser level or a string level to determine the grade of the garden. If the area has a slope of more than 2 percent, you must implement grading to create a flat terrace for the oven. Start by excavating the footprint to a depth of 8 inches, then fill it with crushed stone, tamping it down using a plate compactor. This creates the solid “internal skeleton” for your kitchen area.
Once the base is set, the construction of the plinth begins. Whether using cinder blocks or natural fieldstone, ensure the height is comfortable for the primary user. Usually, a hearth height of 36 to 40 inches is standard. After the plinth is complete, lay a layer of insulating bottles mixed with sawdust and clay to prevent heat from escaping into the base. This ensures the Traditional Clay Ovens remain hot for hours. The oven dome is then shaped over a “sand mold,” which is later excavated through the door. Finally, apply a mulch layer around the perimeter of the paving, using wood chips or river rock to suppress weeds and manage runoff.
Common Landscaping Failures
The most frequent mistake in garden oven projects is poor drainage. If the oven is placed at the bottom of a slope, water will eventually saturate the foundation, leading to “wicking” where moisture climbs up the clay walls. This causes the structure to soften and eventually collapse. Always ensure there is a French drain or a swale nearby to divert rainwater. Another common failure is placing the oven too close to low-hanging branches. The intense heat from the chimney can scorch leaves or, in extreme cases, ignite dry timber. Maintain a minimum clearance of 10 feet from any overhanging canopy.
Soil compaction is another overlooked issue. During the construction of the oven, heavy foot traffic can crush the soil structure in nearby planting beds. This kills the “pore space” and prevents oxygen from reaching the roots of your native plants. Use plywood sheets to distribute the weight of the builders and materials. Furthermore, many DIY builders ignore the “thermal bridge.” If the oven dome touches the exterior decorative stone directly without an insulation break, the heat will bleed out, making the oven inefficient and potentially causing the exterior masonry to crack under thermal expansion.
Seasonal Maintenance
Managing a landscape with a clay oven requires a seasonal calendar. In the spring, inspect the exterior “skin” of the oven for hairline cracks caused by winter frosts. These should be filled with a thin clay slurry to prevent water from entering the core. Apply a fresh layer of mulch around the base to refresh the aesthetic and keep dust away from the cooking surface. Summer maintenance involves keeping the surrounding herbs like Rosemary and Thyme pruned to encourage new growth. Ensure that irrigation systems are functioning correctly, as the radiant heat from the oven can dry out nearby soil faster than usual.
During the autumn, the primary goal is debris management. Falling leaves can clog the chimney or pile up against the base of the oven, creating a moisture trap. Clean the chimney of any soot buildup using a stiff-wire brush. As winter approaches, if you live in a climate with heavy snow or rain, the oven must be covered. A heavy duty tarp or a custom-built timber roof or “pavilion” is the best way to ensure the clay stays dry. If the interior of the clay becomes saturated and then freezes, the expansion of the ice will shatter the dome from the inside out. Physical protection is the only way to avoid this catastrophic failure.
Professional Landscaping FAQ
How far should a clay oven be from the house?
Maintain a minimum distance of 15 feet from any wooden structure or siding. This prevents heat damage and ensures that smoke does not enter the home through open windows or vents during the firing process.
What is the best foundation for a heavy clay oven?
A compacted gravel base of 6 to 8 inches topped with a reinforced concrete slab is ideal. This prevents the oven from sinking or tilting as the soil settles over various seasons.
Can I build a clay oven on a wooden deck?
It is not recommended due to the extreme weight and fire hazard. However, if the deck is structurally reinforced to hold several tons and a non-combustible hearth pad is installed, it may be possible with local permits.
How do I prevent weeds from growing around the oven?
Install a geotextile fabric beneath your paving stones or gravel. Follow this with a 2 inch layer of stone screenings or polymer sand to lock the joints and deny weeds a place to take root.
Will the oven heat kill my nearby plants?
Radiant heat can stress foliage within 3 feet of the dome. Choose heat-tolerant species like Mediterranean herbs and avoid planting delicate, moisture-loving flowers directly adjacent to the oven walls or the chimney vent.